- 重要な情報
- はじめに
- Datadog
- Datadog サイト
- DevSecOps
- AWS Lambda のサーバーレス
- エージェント
- インテグレーション
- コンテナ
- ダッシュボード
- アラート設定
- ログ管理
- トレーシング
- プロファイラー
- タグ
- API
- Service Catalog
- Session Replay
- Continuous Testing
- Synthetic モニタリング
- Incident Management
- Database Monitoring
- Cloud Security Management
- Cloud SIEM
- Application Security Management
- Workflow Automation
- CI Visibility
- Test Visibility
- Intelligent Test Runner
- Code Analysis
- Learning Center
- Support
- 用語集
- Standard Attributes
- ガイド
- インテグレーション
- エージェント
- OpenTelemetry
- 開発者
- 認可
- DogStatsD
- カスタムチェック
- インテグレーション
- Create an Agent-based Integration
- Create an API Integration
- Create a Log Pipeline
- Integration Assets Reference
- Build a Marketplace Offering
- Create a Tile
- Create an Integration Dashboard
- Create a Recommended Monitor
- Create a Cloud SIEM Detection Rule
- OAuth for Integrations
- Install Agent Integration Developer Tool
- サービスのチェック
- IDE インテグレーション
- コミュニティ
- ガイド
- API
- モバイルアプリケーション
- CoScreen
- Cloudcraft
- アプリ内
- Service Management
- インフラストラクチャー
- アプリケーションパフォーマンス
- APM
- Continuous Profiler
- データベース モニタリング
- Data Streams Monitoring
- Data Jobs Monitoring
- Digital Experience
- Software Delivery
- CI Visibility (CI/CDの可視化)
- CD Visibility
- Test Visibility
- Intelligent Test Runner
- Code Analysis
- Quality Gates
- DORA Metrics
- セキュリティ
- セキュリティの概要
- Cloud SIEM
- クラウド セキュリティ マネジメント
- Application Security Management
- AI Observability
- ログ管理
- Observability Pipelines(観測データの制御)
- ログ管理
- 管理
カスタム宛先へのログの転送
ガバメントサイトでは、ログ転送はご利用いただけません。詳しくはアカウント担当者にお問い合わせください。
概要
ログ転送を使用すると、Datadog から Splunk、Elasticsearch、HTTP エンドポイントなどのカスタム宛先にログを送信することができます。つまり、ログパイプラインを使用して、Datadog でログを一元的に収集、処理、標準化することが可能です。その後、Datadog から他のツールにログを送信し、各チームのワークフローをサポートします。取り込まれたログは、インデックスの有無にかかわらず、カスタム宛先に転送することができます。ログは JSON 形式で転送され、GZIP で圧縮されます。
Note: Only Datadog users with the logs_write_forwarding_rules permission can create, edit, and delete custom destinations for forwarding logs.
If a forwarding attempt fails (for example: if your destination temporarily becomes unavailable), Datadog retries periodically for 2 hours using an exponential backoff strategy. The first attempt is made following a 1-minute delay. For subsequent retries, the delay increases progressively to a maximum of 8-12 minutes (10 minutes with 20% variance).
次のメトリクスは、再試行後に正常に送信されたログなどの正常に転送されたログ、およびドロップされたログについて報告します。
- datadog.forwarding.logs.bytes
- datadog.forwarding.logs.count
カスタム宛先へのログ転送設定
- Add webhook IPs from the IP ranges list to the allowlist.
- ログ転送に移動します。
- Custom Destinations を選択します。
- New Destination をクリックします。
- 転送するログをフィルターするためのクエリを入力します。詳しくは、検索構文を参照してください。
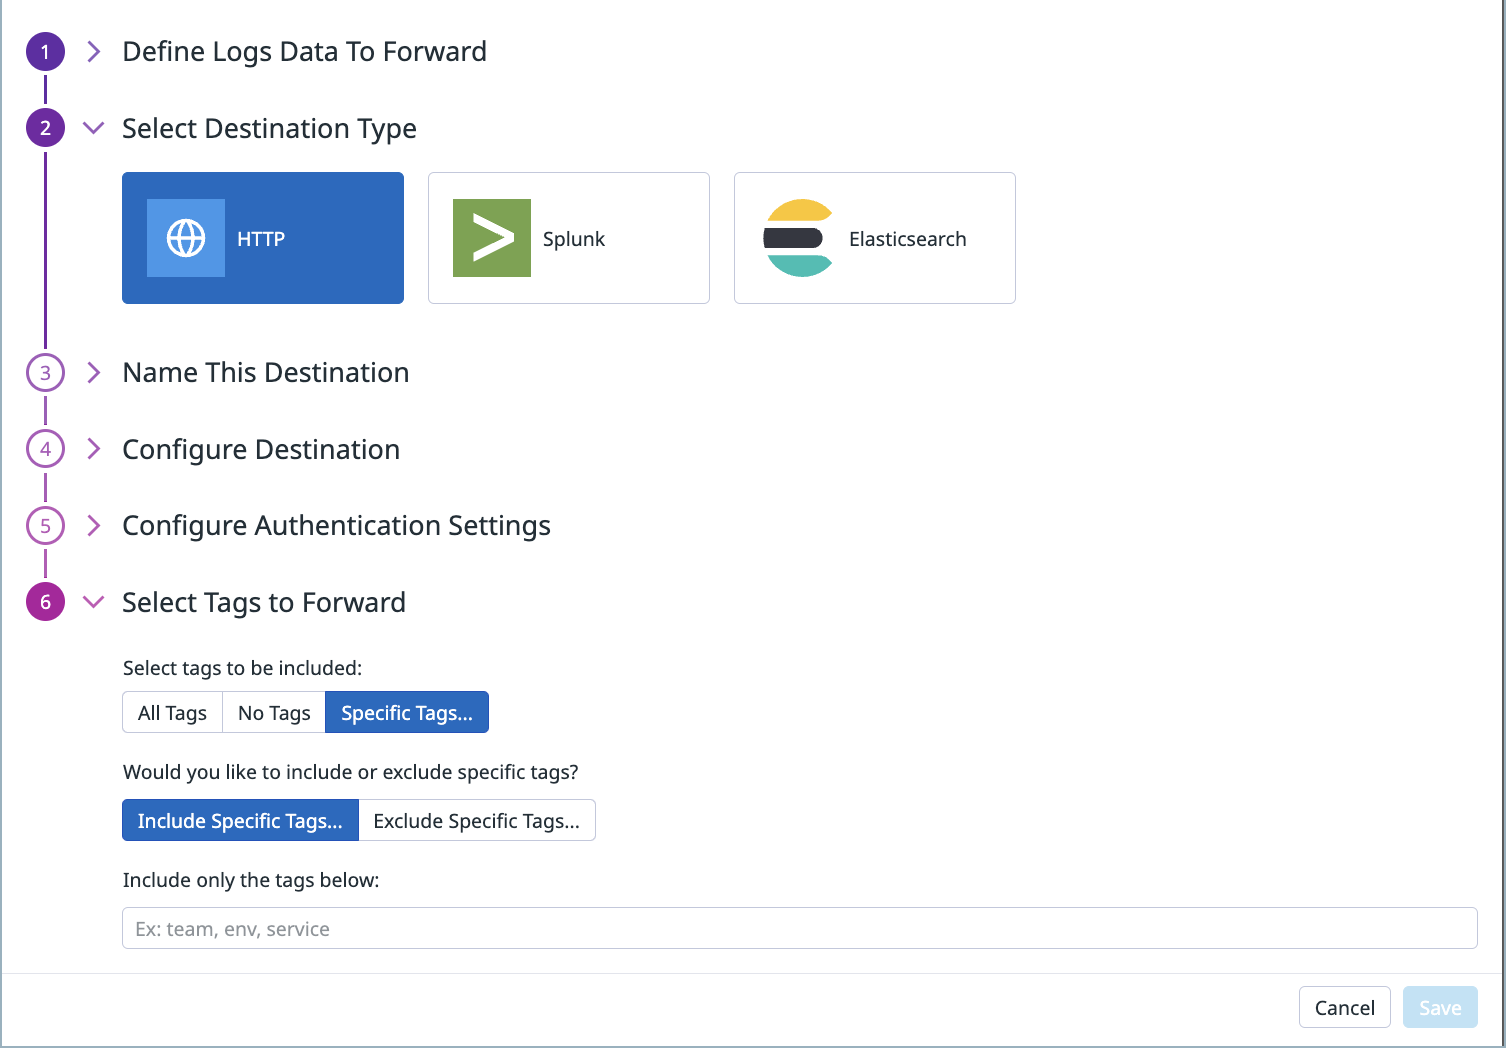
- Destination Type を選択します。
- 宛先の名前を入力します。
- Define endpoint フィールドで、ログを送信するエンドポイントを入力します。エンドポイントは、
https://で始まる必要があります。- 例えば、Sumo Logic にログを送信する場合、ログとメトリクスのための HTTP ソースの構成ドキュメント に従って HTTP Source Address URL を取得し、コレクターにデータを送信します。HTTP Source Address URL を Define endpoint フィールドに入力します。
- Configure Authentication セクションで、以下の認証タイプのいずれかを選択し、関連する詳細を入力します。
- Basic Authentication: ログの送信先となるアカウントのユーザー名とパスワードを入力します。
- Request Header: ヘッダー名と値を指定します。例えば、Authorization ヘッダーを使用し、ログを送信するアカウントのユーザー名が
myaccountで、パスワードがmypasswordの場合:- Header Name に
Authorizationを入力します。 - ヘッダー値は
Basic username:passwordというフォーマットで、username:passwordは base64 でエンコードされています。この例では、ヘッダー値はBasic bXlhY2NvdW50Om15cGFzc3dvcmQ=となります。
- Header Name に
- 宛先の名前を入力します。
- In the Configure Destination section, enter the endpoint to which you want to send the logs. The endpoint must start with
https://. For example, enterhttps://<your_account>.splunkcloud.com:8088. Note:/services/collector/eventis automatically appended to the endpoint. - In the Configure Authentication section, enter the Splunk HEC token. See Set up and use HTTP Event Collector for more information about the Splunk HEC token. Note: The indexer acknowledgment needs to be disabled.
- 宛先の名前を入力します。
- Configure Destination セクションで、以下の内容を入力します。
a. ログを送信するエンドポイント。エンドポイントは
https://で始まらなければなりません。Elasticsearch のエンドポイント例:https://<your_account>.us-central1.gcp.cloud.es.iob. ログを送信する宛先インデックスの名前。 c. オプションで、新しいインデックスを作成する頻度を示すインデックスローテーションを選択します。No Rotation、Every Hour、Every Day、Every Week、またはEvery Monthです。デフォルトはNo Rotationです。 - Configure Authentication セクションで、Elasticsearch アカウントのユーザー名とパスワードを入力します。
- In the Select Tags to Forward section: a. Select whether you want All tags, No tags, or Specific Tags to be included. b. Select whether you want to Include or Exclude specific tags, and specify which tags to include or exclude.
- Save をクリックします。
Log Forwarding ページで、宛先のステータスにカーソルを合わせると、過去 1 時間に転送されたフィルターの条件に一致するログの割合が表示されます。
宛先を編集する
- ログ転送に移動します。
- Custom Destinations を選択すると、既存のすべての宛先のリストが表示されます。
- 編集したい宛先の Edit ボタンをクリックします。
- 構成ページで変更します。
- Save をクリックします。
宛先を削除する
- ログ転送に移動します。
- Custom Destinations を選択すると、既存のすべての宛先のリストが表示されます。
- 削除したい宛先の Delete ボタンをクリックし、Confirm をクリックします。これにより、設定されている宛先リストから宛先が削除され、ログが転送されなくなります。


