- Esenciales
- Empezando
- Datadog
- Sitio web de Datadog
- DevSecOps
- Serverless para Lambda AWS
- Agent
- Integraciones
- Contenedores
- Dashboards
- Monitores
- Logs
- Rastreo de APM
- Generador de perfiles
- Etiquetas (tags)
- API
- Catálogo de servicios
- Session Replay
- Continuous Testing
- Monitorización Synthetic
- Gestión de incidencias
- Monitorización de bases de datos
- Cloud Security Management
- Cloud SIEM
- Application Security Management
- Workflow Automation
- CI Visibility
- Test Visibility
- Intelligent Test Runner
- Análisis de código
- Centro de aprendizaje
- Compatibilidad
- Glosario
- Atributos estándar
- Guías
- Agent
- Uso básico del Agent
- Arquitectura
- IoT
- Plataformas compatibles
- Recopilación de logs
- Configuración
- Configuración remota
- Automatización de flotas
- Actualizar el Agent
- Solucionar problemas
- Detección de nombres de host en contenedores
- Modo de depuración
- Flare del Agent
- Estado del check del Agent
- Problemas de NTP
- Problemas de permisos
- Problemas de integraciones
- Problemas del sitio
- Problemas de Autodiscovery
- Problemas de contenedores de Windows
- Configuración del tiempo de ejecución del Agent
- Consumo elevado de memoria o CPU
- Guías
- Seguridad de datos
- Integraciones
- OpenTelemetry
- Desarrolladores
- Autorización
- DogStatsD
- Checks personalizados
- Integraciones
- Crear una integración basada en el Agent
- Crear una integración API
- Crear un pipeline de logs
- Referencia de activos de integración
- Crear una oferta de mercado
- Crear un cuadro
- Crear un dashboard de integración
- Crear un monitor recomendado
- Crear una regla de detección Cloud SIEM
- OAuth para integraciones
- Instalar la herramienta de desarrollo de integraciones del Agente
- Checks de servicio
- Complementos de IDE
- Comunidad
- Guías
- API
- Aplicación móvil de Datadog
- CoScreen
- Cloudcraft
- En la aplicación
- Dashboards
- Notebooks
- Editor DDSQL
- Hojas
- Monitores y alertas
- Infraestructura
- Métricas
- Watchdog
- Bits AI
- Catálogo de servicios
- Catálogo de APIs
- Error Tracking
- Gestión de servicios
- Objetivos de nivel de servicio (SLOs)
- Gestión de incidentes
- De guardia
- Gestión de eventos
- Gestión de casos
- Workflow Automation
- App Builder
- Infraestructura
- Universal Service Monitoring
- Contenedores
- Serverless
- Monitorización de red
- Coste de la nube
- Rendimiento de las aplicaciones
- APM
- Términos y conceptos de APM
- Instrumentación de aplicación
- Recopilación de métricas de APM
- Configuración de pipelines de trazas
- Correlacionar trazas (traces) y otros datos de telemetría
- Trace Explorer
- Observabilidad del servicio
- Instrumentación dinámica
- Error Tracking
- Seguridad de los datos
- Guías
- Solucionar problemas
- Continuous Profiler
- Database Monitoring
- Gastos generales de integración del Agent
- Arquitecturas de configuración
- Configuración de Postgres
- Configuración de MySQL
- Configuración de SQL Server
- Configuración de Oracle
- Configuración de MongoDB
- Conexión de DBM y trazas
- Datos recopilados
- Explorar hosts de bases de datos
- Explorar métricas de consultas
- Explorar ejemplos de consulta
- Solucionar problemas
- Guías
- Data Streams Monitoring
- Data Jobs Monitoring
- Experiencia digital
- Real User Monitoring
- Monitorización del navegador
- Configuración
- Configuración avanzada
- Datos recopilados
- Monitorización del rendimiento de páginas
- Monitorización de signos vitales de rendimiento
- Monitorización del rendimiento de recursos
- Recopilación de errores del navegador
- Rastrear las acciones de los usuarios
- Señales de frustración
- Error Tracking
- Solucionar problemas
- Monitorización de móviles y TV
- Plataforma
- Session Replay
- Exploración de datos de RUM
- Feature Flag Tracking
- Error Tracking
- Guías
- Seguridad de los datos
- Monitorización del navegador
- Análisis de productos
- Pruebas y monitorización de Synthetics
- Continuous Testing
- Entrega de software
- CI Visibility
- CD Visibility
- Test Visibility
- Configuración
- Tests en contenedores
- Búsqueda y gestión
- Explorador
- Monitores
- Flujos de trabajo de desarrolladores
- Cobertura de código
- Instrumentar tests de navegador con RUM
- Instrumentar tests de Swift con RUM
- Detección temprana de defectos
- Reintentos automáticos de tests
- Correlacionar logs y tests
- Guías
- Solucionar problemas
- Intelligent Test Runner
- Code Analysis
- Quality Gates
- Métricas de DORA
- Seguridad
- Información general de seguridad
- Cloud SIEM
- Cloud Security Management
- Application Security Management
- Observabilidad de la IA
- Log Management
- Observability Pipelines
- Gestión de logs
- Administración
- Gestión de cuentas
- Seguridad de los datos
- Sensitive Data Scanner
- Ayuda
Cloud Foundry Setup Guide
This page is not yet available in Spanish. We are working on its translation.
If you have any questions or feedback about our current translation project, feel free to reach out to us!
If you have any questions or feedback about our current translation project, feel free to reach out to us!
Overview
Cloud Foundry deployments can send metrics and events to Datadog. You can track the health and availability of all nodes in a deployment, monitor the jobs they run, collect metrics from the Loggregator Firehose, and more. This page walks you through how to set up monitoring for your Cloud Foundry environment.
There are four main components for the Cloud Foundry integration with Datadog.
- The Cloud Foundry Buildpack - used to collect custom metrics, logs, traces, and profiles from your Cloud Foundry applications.
- The Agent BOSH Release - used to collect events and metrics from BOSH VMs and sends them to Datadog.
- The Cluster Agent BOSH Release - used to collect cluster-level and application-level metadata from the CAPI and the BBS and container tags.
- The Firehose Nozzle - collects all other metrics from the Loggregator Firehose in your infrastructure.
Read the Datadog VMware Tanzu Application Service architecture guide for more information.
Monitor your applications
Use the Datadog Cloud Foundry Buildpack to monitor your Cloud Foundry application. This is a Cloud Foundry supply buildpack that installs the Datadog Container Agent (a lightweight version of the Agent), Datadog Trace Agent for APM, and Datadog DogStatsD binary file in the container your app is running on.
Multiple Buildpacks (recommended)
Download the latest Datadog buildpack release and upload it to your Cloud Foundry environment.
cf create-buildpack datadog-cloudfoundry-buildpack ./datadog-cloudfoundry-buildpack-latest.zipPush your application, including both the Datadog buildpack and your regular buildpacks. The process to push your application with multiple buildpacks is described in Pushing an App with Multiple Buildpacks.
cf push <YOUR_APP> --no-start -b binary_buildpack cf v3-push <YOUR_APP> -b datadog-cloudfoundry-buildpack -b <YOUR-BUILDPACK-1> -b <YOUR-FINAL-BUILDPACK>Note: If you were using a single buildpack before, it should be the last one loaded so it acts as a final buildpack. To learn more, see Cloud Foundry’s How Buildpacks Work.
Multi-Buildpack (deprecated)
The Datadog buildpack uses the Cloud Foundry Pushing an App with Multiple Buildpacks feature that was introduced in version 1.12.
For older versions, Cloud Foundry provides a backwards compatible version of this feature in the form of a multi-buildpack. You must install and configure this version to use Datadog’s buildpack.
Download the latest multi-buildpack release and upload it to your Cloud Foundry environment.
cf create-buildpack multi-buildpack ./multi-buildpack-v-x.y.z.zip 99 --enableAdd a multi-buildpack manifest to your application. As detailed in the usage section of the multi-buildpack repository, create a
multi-buildpack.ymlfile at the root of your application and configure it for your environment. Add a link to the Datadog Cloud Foundry Buildpack and to your regular buildpack:buildpacks: - "https://cloudfoundry.datadoghq.com/datadog-cloudfoundry-buildpack/datadog-cloudfoundry-buildpack-4.36.0.zip" - "https://github.com/cloudfoundry/ruby-buildpack#v1.7.18" # Replace this with your regular buildpackThe URLs for the Datadog Buildpack are:
https://cloudfoundry.datadoghq.com/datadog-cloudfoundry-buildpack/datadog-cloudfoundry-buildpack-latest.ziphttps://cloudfoundry.datadoghq.com/datadog-cloudfoundry-buildpack/datadog-cloudfoundry-buildpack-x.y.z.zip
Do not use the
latestversion here (replacex.y.zwith the specific version you want to use).Note: Your regular buildpack should be the last one listed in the manifest. To learn more, see Cloud Foundry’s How Buildpacks Work.
Push your application with the multi-buildpack. Ensure that the
multi-buildpackis the buildpack selected by Cloud Foundry for your application:cf push <YOUR_APP> -b multi-buildpack
Meta-Buildpack (deprecated)
If you are a meta-buildpack user, Datadog’s buildpack can be used as a decorator out of the box.
Note: Cloud Foundry has deprecated the meta-buildpack in favor of the multi-buildpack.
Monitor your Cloud Foundry cluster
There are three points of integration with Datadog, each of which achieves a different goal:
- Datadog Agent BOSH release - Install the Datadog Agent on every node in your deployment to track system, network, and disk metrics. Enable any other Agent checks you wish.
- Datadog Cluster Agent BOSH release - Deploy one Datadog Cluster Agent job. The job queries the CAPI and BBS API to collect cluster-level and application-level metadata to provide improved tagging capabilities in your applications and containers.
- Datadog Firehose Nozzle - Deploy one or more Datadog Firehose Nozzle jobs. The jobs tap into your deployment’s Loggregator Firehose and send all non-container metrics to Datadog.
These integrations are meant for Cloud Foundry deployment administrators, not end users.
Prerequisites
You must have a working Cloud Foundry deployment and access to the BOSH Director that manages it. You also need BOSH CLI to deploy each integration. You may use either major version of the CLI – v1 or v2.
Install the Datadog Agent BOSH release
Datadog provides tarballs of the Datadog Agent packaged as a BOSH release. Upload the latest release to your BOSH Director and then install it on every node in your deployment as an addon (the same way a Director deploys the BOSH Agent to all nodes).
Upload Datadog’s release to your BOSH Director
# BOSH CLI v1
bosh upload release https://cloudfoundry.datadoghq.com/datadog-agent/datadog-agent-boshrelease-latest.tgz
# BOSH CLI v2
bosh upload-release -e <BOSH_ENV> https://cloudfoundry.datadoghq.com/datadog-agent/datadog-agent-boshrelease-latest.tgz
If you’d like to create your own release, see the Datadog Agent BOSH Release repository.
Configure the Agent as an addon in your BOSH Director
Add the following to your BOSH Director’s runtime configuration file (runtime.yml):
---
releases:
  - name: datadog-agent
    version: <VERSION_YOU_UPLOADED> # specify the real version (x.y.z not 'latest')
addons:
- name: datadog
  jobs:
  - name: dd-agent
    release: datadog-agent
  properties:
    dd:
      use_dogstatsd: true
      dogstatsd_port: 18125       # Many CF deployments have a StatsD already on port 8125
      api_key: <DATADOG_API_KEY>
      tags: ["<KEY:VALUE>"]       # any tags you wish
      generate_processes: true    # to enable the process check
To see which datadog-agent release version was uploaded earlier, run bosh releases.
Load the runtime.yml
Check if you have a previously configured runtime-config by running:
# BOSH CLI v1
`bosh runtime-config`
# BOSH CLI v2
bosh -e <BOSH_ENV> runtime-config
In BOSH v2, if the runtime.yml file is empty, you should see the response: No runtime config.
Enable extra Agent checks
For each extra Agent check to enable across your deployment, add its configuration under the properties.dd.integrations key, for example:
properties:
    dd:
        integrations:
            directory:
                init_config: {}
                instances:
                    directory: '.'
            #process:
            #  init_config: {}
            #...
The configuration under each check name uses the same format as when configuring the check in its own file in the Agent’s conf.d directory.
Everything you configure in runtime.yml applies to every node. You cannot configure a check for a subset of nodes in your deployment.
To customize configuration for the default checks (system, network, disk, and NTP), see the full list of configuration options for the Datadog Agent BOSH release.
Sync the runtime configuration to the BOSH Director
# BOSH CLI v1
bosh update runtime-config runtime.yml
# BOSH CLI v2
bosh update-runtime-config -e <BOSH_ENV> runtime.yml
Redeploy your Cloud Foundry deployment
# BOSH CLI v1
bosh deployment <YOUR_DEPLOYMENT_MANIFEST>.yml
bosh -n deploy --recreate
# BOSH CLI v2
bosh -n -d <YOUR_DEPLOYMENT> -e <BOSH_ENV> deploy --recreate <YOUR_DEPLOYMENT_MANIFEST>.yml
Since runtime configuration applies globally, BOSH redeploys every node in your deployment. If you have more than one deployment, redeploy all deployments to install the Datadog Agent everywhere.
Verify the Agent is installed everywhere
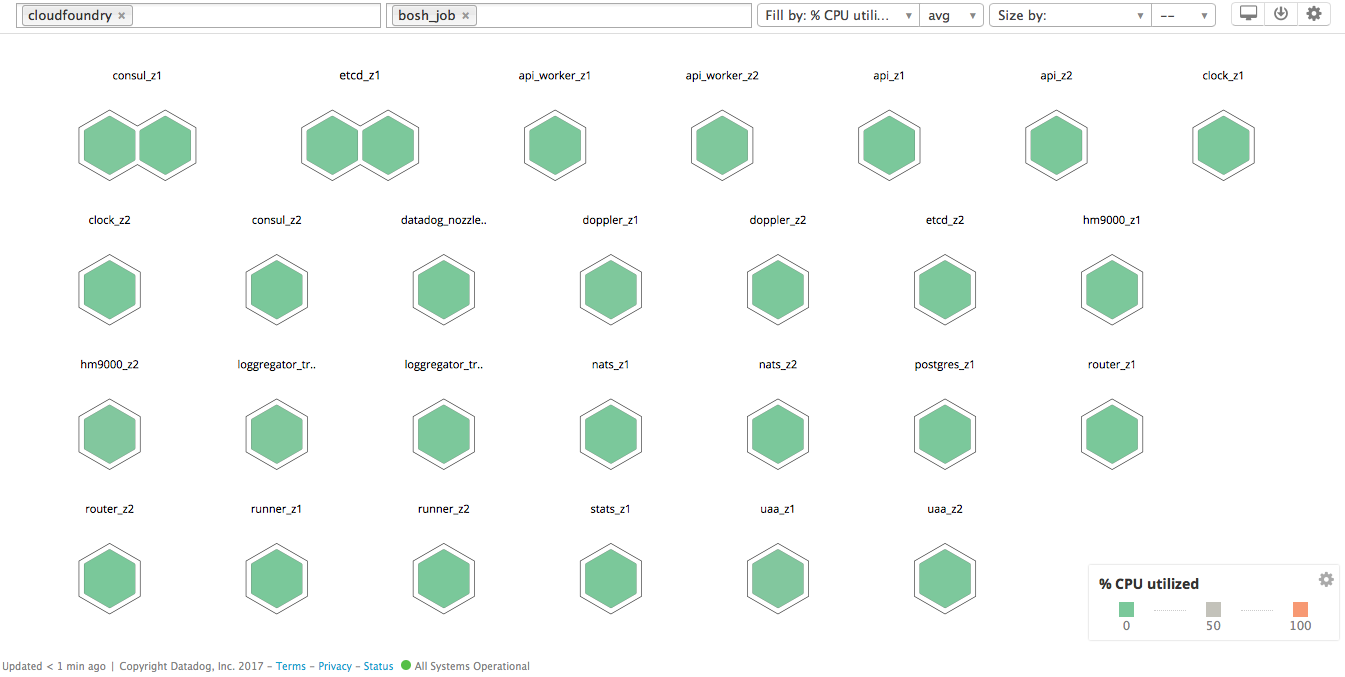
To check if the Agent installations were successful, filter by cloudfoundry on the Host Map. The Datadog Agent BOSH release tags each host with cloudfoundry. Optionally, group hosts by any tag, such as bosh_job, as in the following screenshot:
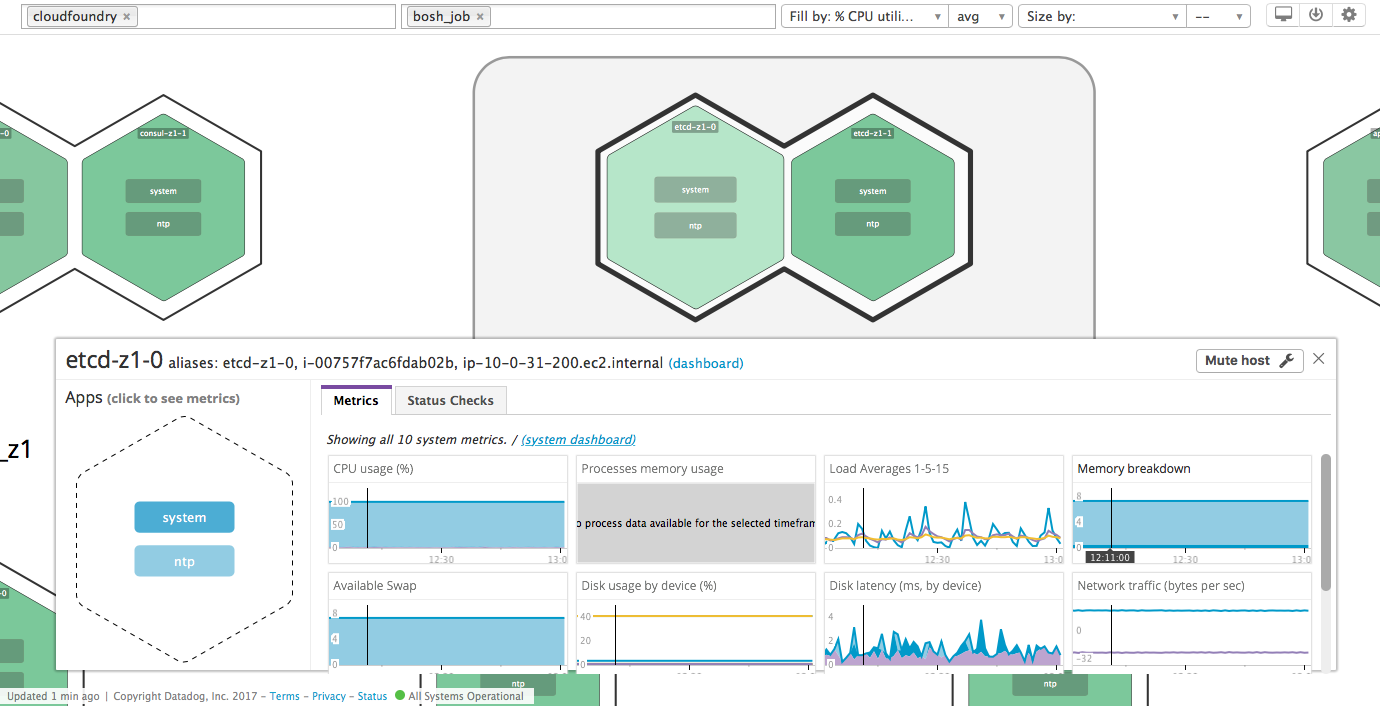
Click on any host to zoom in, then click system within its hexagon to make sure Datadog is receiving system metrics:
Collect CAPI metadata and Cluster Agent tags in Cloud Foundry containers
For Datadog Agent versions 7.40.1 and later, you can collect CAPI metadata and Datadog Cluster Agent (DCA) tags from Cloud Foundry containers. Application labels and annotations are present in the application logs, metrics, and traces.
Install the Datadog Cluster Agent (DCA) BOSH release
The Datadog Cluster Agent BOSH release is a BOSH package for running the Datadog Cluster Agent on Cloud Foundry.
This package is to be used in conjunction with the Datadog Agent BOSH Release. It provides a BOSH link consumed by the Datadog Agent BOSH release to Autodiscover and schedule integrations for your apps, as well as improved tagging for application containers and process discovery. For more information, see the spec in GitHub.
Upload Datadog’s Cluster Agent release to your BOSH Director
# BOSH CLI v1
bosh upload release https://cloudfoundry.datadoghq.com/datadog-cluster-agent/datadog-cluster-agent-boshrelease-latest.tgz
# BOSH CLI v2
bosh upload-release -e <BOSH_ENV> https://cloudfoundry.datadoghq.com/datadog-cluster-agent/datadog-cluster-agent-boshrelease-latest.tgz
Deployment
Use the example deploy manifest template below to deploy the Datadog Cluster Agent and expose it to the Datadog Agent. See the spec in GitHub for available properties.
jobs:
- name: datadog-cluster-agent
  release: datadog-cluster-agent
  properties:
    cluster_agent:
      token: <TOKEN>  # 32 or more characters in length
      bbs_poll_interval: 10
      warmup_duration: 5
      log_level: INFO
      bbs_ca_crt: <CA_CERTIFICATE>
      bbs_client_crt: <CLIENT_CERTIFICATE>
      bbs_client_key: <CLIENT_PRIVATE_KEY>
  provides:
    datadog-cluster-agent:
      aliases:
        - domain: <DNS_NAME (e.g. datadog-cluster-agent)>
Replace <TOKEN> with your Cluster Agent token.
Note: This creates a DNS alias for the Datadog Cluster Agent service which makes it addressable through a static alias. See Aliases to services in the BOSH documentation for more details on BOSH DNS aliases.
This DNS alias is specified in the cluster_agent.address job property of the Datadog Agent runtime configuration, as shown in the example template below:
jobs:
- name: datadog-agent
  release: datadog-agent
  properties:
    ...
    cluster_agent:
      address: <DNS_NAME>
    ...
Integration configurations discovery
The Datadog Cluster Agent discovers integrations based on an AD_DATADOGHQ_COM environment variable set in your applications.
This environment variable is a JSON object containing the Autodiscovery configuration templates for your application. The Datadog Cluster Agent can discover and render two types of configurations:
- Configurations for services bound to your application, whether they be user-provided or from a service broker.
- Configurations for services running inside your application, for example, a web-server.
The JSON object should be a dictionary associating a service name to its Autodiscovery template:
{
    "<SERVICE_NAME>": {
        "check_names": [<LIST_OF_INTEGRATION_NAMES_TO_CONFIGURE>],
        "init_configs": [<LIST_OF_INIT_CONFIGS>],
        "instances": [<LIST_OF_INSTANCES>],
        "variables": [<LIST_OF_VARIABLES_DEFINITIONS>]
    }
}
For services bound to the application, the <SERVICE_NAME> should be the name of the service as it appears in the cf services command output. For services running inside the application, the <SERVICE_NAME> can be anything.
The variables key is used only for bound services to resolve template variables inside the configuration template, and must contain the JSON path of the desired value for the VCAP_SERVICES environment variable. You can inspect this with the cf env <APPLICATION_NAME> command.
Note: The Datadog Cluster Agent is only able to resolve credentials of services directly available in the VCAP_SERVICES environment variable for Autodiscovery.
Example
This Autodiscovery configuration in the AD_DATADOGHQ_COM environment variable demonstrates a Cloud Foundry application running a web server bound to a PostgreSQL service:
AD_DATADOGHQ_COM: '{
    "web_server": {
        "check_names": ["http_check"],
        "init_configs": [{}],
        "instances": [
            {
                "name": "My Nginx",
                "url": "http://%%host%%:%%port_p8080%%",
                "timeout": 1
            }
        ]
    }
    "postgres-service-name": {
        "check_names": ["postgres"],
        "init_configs": [{}],
        "instances": [
            {
                "host": "%%host%%",
                "port": 5432,
                "username": "%%username%%",
                "dbname": "%%dbname%%",
                "password": "%%password%%"
            }
        ],
        "variables": {
            "host": "$.credentials.host",
            "username": "$.credentials.Username",
            "password": "$.credentials.Password",
            "dbname": "$.credentials.database_name"
        }
    }
}'
This example demonstrates the accompanying VCAP_SERVICES environment variable:
VCAP_SERVICES: '{
    "my-postgres-service": [
        {
            "credentials": {
                Password: "1234",
                Username: "User1234",
                host: "postgres.example.com",
                database_name: "my_db",
            },
            "name": "postgres-service-name",
        }
    ]
}'
In the example above, the first item web_server is a configuration for a service running inside the application.
There are no variables, and it uses the %%host%% and %%port%% template variables available through Autodiscovery.
The second item postgres-service-name is a configuration for a service bound to the application.
To resolve the template variables, it uses the variables dictionary to define the values used in the instance configuration.
This dictionary contains a JSONPath object indicating where to find the variable values for the service postgres-service-name defined in the VCAP_SERVICES environment variable.
See Cluster Checks for more information about Autodiscovery through the DCA.
Improve CCCache performance on cache miss
For Datadog Agent versions 7.40.1 and later, you can add more flags to increase control over the CCCache behavior and the number of API calls:
refresh_on_cache_missto control cache miss behavior- Split
advanced_tagsintosidecars_tagsandisolation_segments_tags
Improved tagging for application containers and process discovery
Once the two releases are linked, the Datadog Cluster Agent automatically provides cluster-level metadata, which the Node Agents attach as tags to their corresponding Cloud Foundry application containers.
Deploy the Datadog Firehose Nozzle
Datadog provides a BOSH release of the Datadog Firehose Nozzle. After uploading the release to your Director, add the Nozzle to an existing deployment, or create a new deployment that only includes the Nozzle. The following instructions assume you’re adding it to an existing Cloud Foundry deployment that has a working Loggregator Firehose.
Upload Datadog’s release to your BOSH Director
# BOSH CLI v1
bosh upload release http://cloudfoundry.datadoghq.com/datadog-firehose-nozzle/datadog-firehose-nozzle-release-latest.tgz
# BOSH CLI v2
bosh upload-release -e <BOSH_ENV> http://cloudfoundry.datadoghq.com/datadog-firehose-nozzle/datadog-firehose-nozzle-release-latest.tgz
If you’d like to create your own release, see the Datadog Firehose Nozzle release repository.
Configure a UAA client
In the manifest that contains your UAA configuration, add a new client for the Datadog Nozzle so that jobs can access the Firehose:
uaa:
    clients:
        datadog-firehose-nozzle:
            access-token-validity: 1209600
            authorities: doppler.firehose,cloud_controller.admin_read_only
            authorized-grant-types: client_credentials
            override: true
            scope: doppler.firehose,cloud_controller.admin_read_only
            secret: <YOUR_SECRET>
Redeploy to add the user.
Add Firehose Nozzle jobs
Configure one or more Nozzle jobs in your main Cloud Foundry deployment manifest (cf-manifest.yml):
jobs:
#- instances: 4
#  name: some_other_job
#  ...
# add more instances if one job cannot keep up with the Firehose
- instances: 1
  name: datadog_nozzle_z1
  networks:
    # some network you've configured elsewhere in the manifest
    - name: cf1
  # some resource_pool you've configured elsewhere in the manifest
  resource_pool: small_z1
  templates:
    - name: datadog-firehose-nozzle
      release: datadog-firehose-nozzle
  properties:
    datadog:
      api_key: "<YOUR_DATADOG_API_KEY>"
      api_url: https://api.datadoghq.com/api/v1/series
      # seconds between flushes to Datadog. Default is 15.
      flush_duration_seconds: 15
    loggregator:
      # do NOT append '/firehose' or even a trailing slash to the URL; 'ws://<host>:<port>' works
      # for example, ws://traffic-controller.your-cf-domain.com:8081
      traffic_controller_url: "<LOGGREGATOR_URL>"
    nozzle:
      # tags each firehose metric with 'deployment:<DEPLOYMENT_NAME>'
      deployment: "<DEPLOYMENT_NAME>"
      # can be anything (firehose streams data evenly to all jobs using the same subscription_id)
      subscription_id: datadog-nozzle
      # for development only
      # disable_access_control: true
      # for development only; enable if your UAA does not use a verifiable cert
      # insecure_ssl_skip_verify: true
    uaa:
      client: datadog-firehose-nozzle # client name you just configured
      client_secret: "<SECRET_YOU_JUST_CONFIGURED>"
      url: <UAA_URL> # for example, https://uaa.your-cf-domain.com:8443
To see all available configuration options, check the Datadog Firehose Nozzle repository.
In the same manifest, add the Datadog Nozzle release name and version:
releases:
    # - name: "<SOME_OTHER_RELEASE>"
    #   version: <x.y.z>
    # ...
    - name: datadog-firehose-nozzle
      version: '<VERSION_YOU_UPLOADED>' # specify the real version (x.y.z not 'latest')
To see which datadog-firehose-nozzle release version was uploaded earlier, run bosh releases.
Redeploy the deployment
# BOSH CLI v1
bosh deployment cf-manifest.yml
bosh -n deploy --recreate
# BOSH CLI v2
bosh -n -d cf-manifest -e <BOSH_ENV> deploy --recreate cf-manifest.yml
Verify the Firehose Nozzle is collecting data
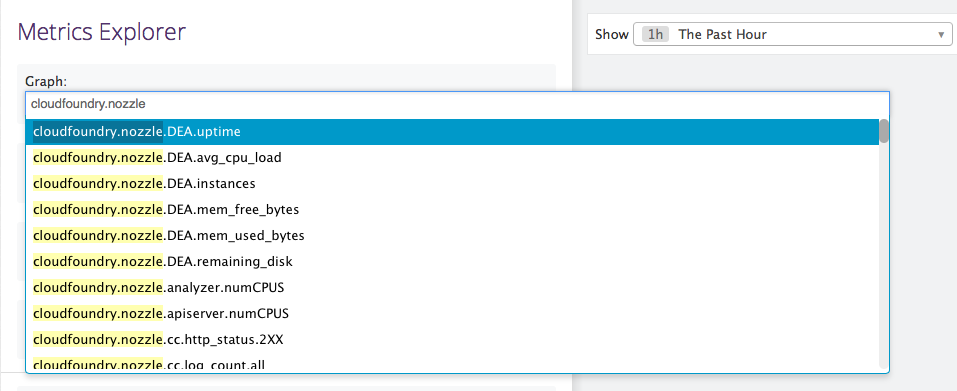
In the Metrics Explorer, search for metrics beginning with cloudfoundry.nozzle.
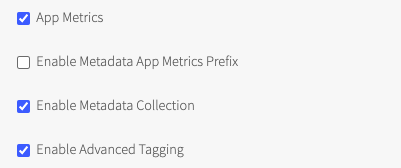
Control the application metadata prefix
You can enable or disable the application metadata prefix in the Firehose Nozzle app metrics.
Further reading
Más enlaces, artículos y documentación útiles:


