- Essentials
- Getting Started
- Datadog
- Datadog Site
- DevSecOps
- Serverless for AWS Lambda
- Agent
- Integrations
- Containers
- Dashboards
- Monitors
- Logs
- APM Tracing
- Profiler
- Tags
- API
- Service Catalog
- Session Replay
- Continuous Testing
- Synthetic Monitoring
- Incident Management
- Database Monitoring
- Cloud Security Management
- Cloud SIEM
- Application Security Management
- Workflow Automation
- CI Visibility
- Test Visibility
- Test Impact Analysis
- Code Analysis
- Learning Center
- Support
- Glossary
- Standard Attributes
- Guides
- Agent
- Integrations
- OpenTelemetry
- Developers
- Authorization
- DogStatsD
- Custom Checks
- Integrations
- Create an Agent-based Integration
- Create an API Integration
- Create a Log Pipeline
- Integration Assets Reference
- Build a Marketplace Offering
- Create a Tile
- Create an Integration Dashboard
- Create a Recommended Monitor
- Create a Cloud SIEM Detection Rule
- OAuth for Integrations
- Install Agent Integration Developer Tool
- Service Checks
- IDE Plugins
- Community
- Guides
- API
- Datadog Mobile App
- CoScreen
- Cloudcraft
- In The App
- Dashboards
- Notebooks
- DDSQL Editor
- Sheets
- Monitors and Alerting
- Infrastructure
- Metrics
- Watchdog
- Bits AI
- Service Catalog
- API Catalog
- Error Tracking
- Service Management
- Infrastructure
- Application Performance
- APM
- Continuous Profiler
- Database Monitoring
- Data Streams Monitoring
- Data Jobs Monitoring
- Digital Experience
- Real User Monitoring
- Product Analytics
- Synthetic Testing and Monitoring
- Continuous Testing
- Software Delivery
- CI Visibility
- CD Visibility
- Test Optimization
- Code Analysis
- Quality Gates
- DORA Metrics
- Security
- Security Overview
- Cloud SIEM
- Cloud Security Management
- Application Security Management
- AI Observability
- Log Management
- Observability Pipelines
- Log Management
- Administration
Monitor Settings
Overview
On the Monitor Settings page, you can access and control the following topics:
Tag policies
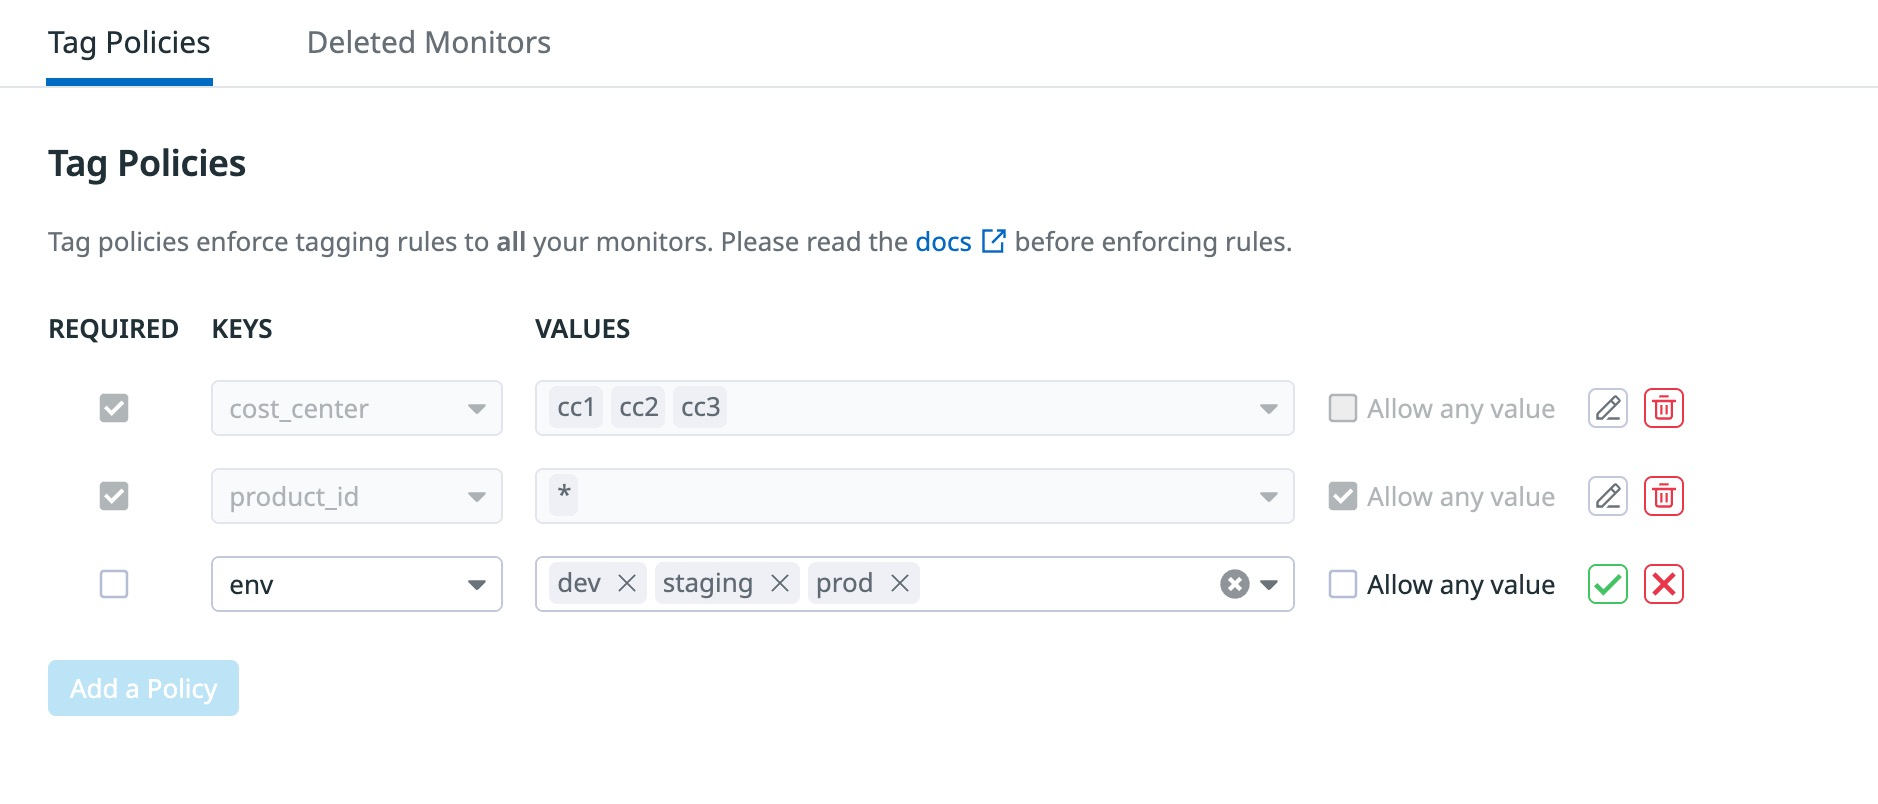
Monitor tag policies allow you to enforce data validation on tags and tag values on your Datadog monitors. This ensures that alerts are sent to the correct downstream systems and workflows for triage and processing.
After set up, tag policies apply to all Datadog monitors
- To create a new monitor, it must adhere to your organization’s tag policies.
- Existing monitors that violate your organization’s tag policies continue to provide alerts and notifications, but must be updated to match the tag policies before you can modify other settings.
Configure monitor tag policies
- Navigate to the Monitors Settings page.
- Open the “Tag policies” tab. There are three data validation rules that are enforced through tag policies:
- Require tags with mandatory values
- Require tags only
- Optional tags with mandatory values
- Click the green checkmark to save the policy.
Require tags with mandatory values
To enforce mandatory tags, select the Required check box and specify both the tag key and values. In this example, monitors are required to have the cost_center tag. The value must be set to cc1, cc2, or cc3.
Require tags only
You can require a tag but allow users to specify their own values. In this example, monitors are required to have the product_id tag. The value can be anything specified by the user.
Optional tag with mandatory values
To make a tag optional but require that monitors with the tag use specific values, enter the values for the tag in the Values field. In this example, the env tag is optional. However, if a monitor uses this tag, the value must be set to dev, staging, or prod.
Permissions
To configure monitor tag policies, you must be assigned a role with the MONITOR_CONFIG_POLICY_WRITE_PERMISSION permission.
For more information, see Role Based Access Control and Role Permissions.
Deleted monitors
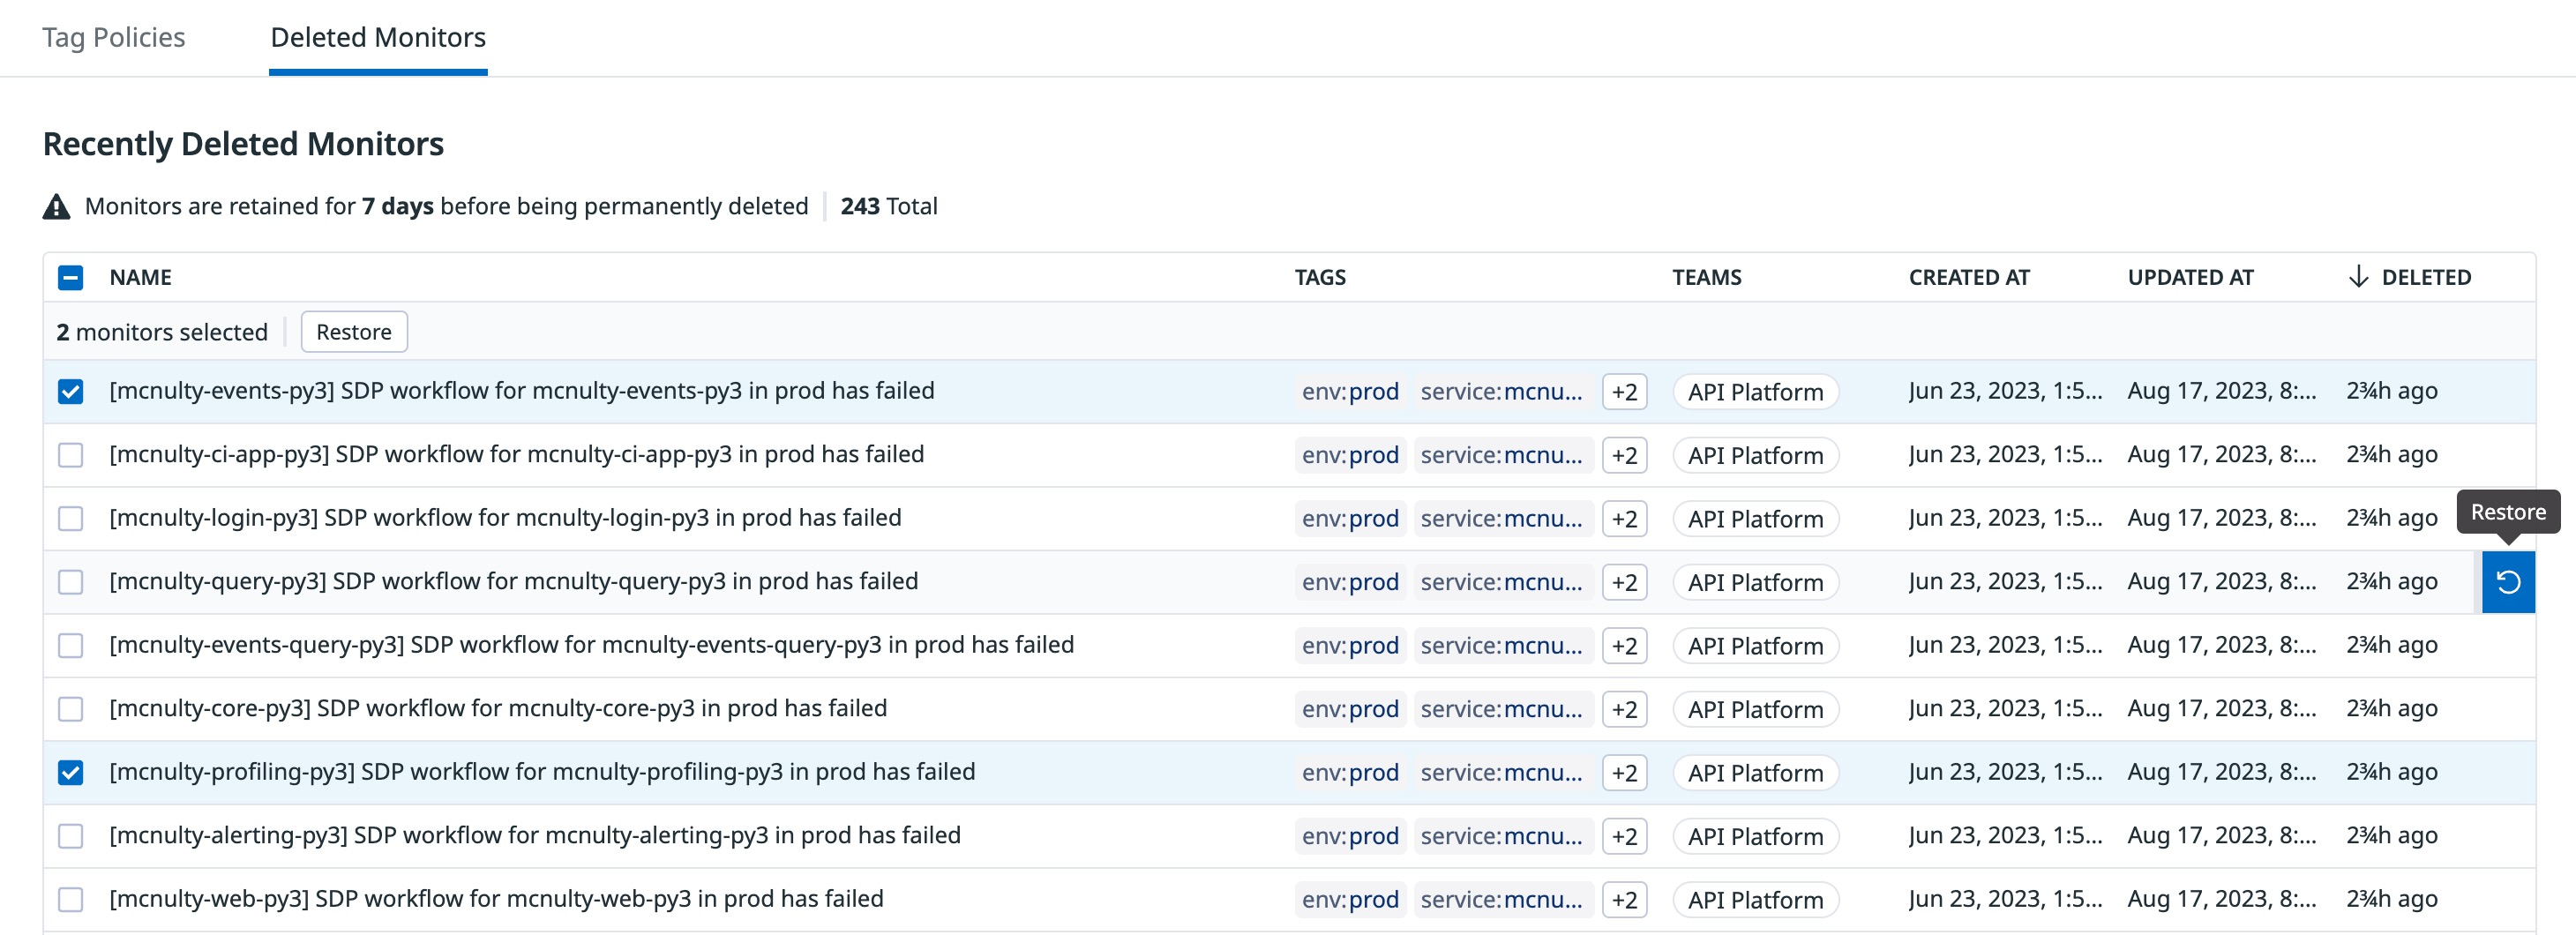
Monitors are retained for 7 days before being permanently deleted. To restore recently deleted Datadog monitors:
- Navigate to the Monitors > Settings page.
- Open the Deleted Monitors tab.
- Select the monitor(s) you want to restore.
- Click the Restore button at the top of the table.
Further Reading
Additional helpful documentation, links, and articles:


