- Essentials
- Getting Started
- Datadog
- Datadog Site
- DevSecOps
- Serverless for AWS Lambda
- Agent
- Integrations
- Containers
- Dashboards
- Monitors
- Logs
- APM Tracing
- Profiler
- Tags
- API
- Service Catalog
- Session Replay
- Continuous Testing
- Synthetic Monitoring
- Incident Management
- Database Monitoring
- Cloud Security Management
- Cloud SIEM
- Application Security Management
- Workflow Automation
- CI Visibility
- Test Visibility
- Test Impact Analysis
- Code Analysis
- Learning Center
- Support
- Glossary
- Standard Attributes
- Guides
- Agent
- Integrations
- OpenTelemetry
- Developers
- Authorization
- DogStatsD
- Custom Checks
- Integrations
- Create an Agent-based Integration
- Create an API Integration
- Create a Log Pipeline
- Integration Assets Reference
- Build a Marketplace Offering
- Create a Tile
- Create an Integration Dashboard
- Create a Recommended Monitor
- Create a Cloud SIEM Detection Rule
- OAuth for Integrations
- Install Agent Integration Developer Tool
- Service Checks
- IDE Plugins
- Community
- Guides
- Administrator's Guide
- API
- Datadog Mobile App
- CoScreen
- Cloudcraft
- In The App
- Dashboards
- Notebooks
- DDSQL Editor
- Sheets
- Monitors and Alerting
- Infrastructure
- Metrics
- Watchdog
- Bits AI
- Service Catalog
- API Catalog
- Error Tracking
- Service Management
- Infrastructure
- Application Performance
- APM
- Continuous Profiler
- Database Monitoring
- Data Streams Monitoring
- Data Jobs Monitoring
- Digital Experience
- Real User Monitoring
- Product Analytics
- Synthetic Testing and Monitoring
- Continuous Testing
- Software Delivery
- CI Visibility
- CD Visibility
- Test Optimization
- Code Analysis
- Quality Gates
- DORA Metrics
- Security
- Security Overview
- Cloud SIEM
- Cloud Security Management
- Application Security Management
- AI Observability
- Log Management
- Observability Pipelines
- Log Management
- Administration
Scale Graphing Expertise with Powerpacks
Overview
Powerpacks are templated groups of widgets that scale graphing expertise as reusable dashboard building blocks. They provide a scalable way to capture domain knowledge or organization-specific standards and share them throughout an organization. Using Powerpacks, you can empower dashboard creators to incorporate knowledge across technology areas into their existing dashboards without additional training.
Powerpacks are either preset (created by Datadog) or custom (created by a user).
- Preset Powerpacks provide out-of-the-box views for common monitoring patterns like performance metrics or feature usage. They are often linked to a specific product or integration (like
RUM Page Views) and are maintained by Datadog. - Anyone with dashboard write permissions can create custom Powerpacks to help users share and standardize internal best practices. Updates to custom Powerpacks are synced to all its Powerpack instances, so you don’t have to make individual updates across multiple dashboards.
This guide addresses best practices for creating and sharing custom Powerpacks.
When do custom Powerpacks help?
As an organization grows, expertise and ownership easily become distributed across multiple teams. Powerpacks work best for organizations with:
- Teams who own a specific technology (for example, Postgres, Kafka, Node.js) or stakes (such as Compliance or Security) across the organization.
- Individual teams in charge of incorporating these technologies or stakes into full-stack and business-driven views.
This ownership model fosters standardization across your teams and provides a scalable way to promote organizational best practices for monitoring key components of a business. For both operational metrics and KPIs, distributing ownership along technology lines and team lines ensures key stakeholders like on-call engineers, SREs, and executives can access and interpret relevant views on dashboards across the business.
Best practices for creating a Powerpack
A well-constructed Powerpack can speed up an organization’s adoption of new monitoring patterns, like adding security observability to all existing application teams’ dashboards. Build a clear, self-contained Powerpack to ensure dashboard owners get the most from your content while minimizing issues or questions.
Build self-explanatory content
The content in a Powerpack should be self-explanatory. When creating a Powerpack, include the context a dashboard viewer needs to interpret and understand the pack, even in the context of other groups on the dashboard. Some tools to achieve this include:
- Clear and short titles to describe what a graph displays.
- Note widgets with additional context.
- Horizontal markers to show expected and unexpected thresholds.
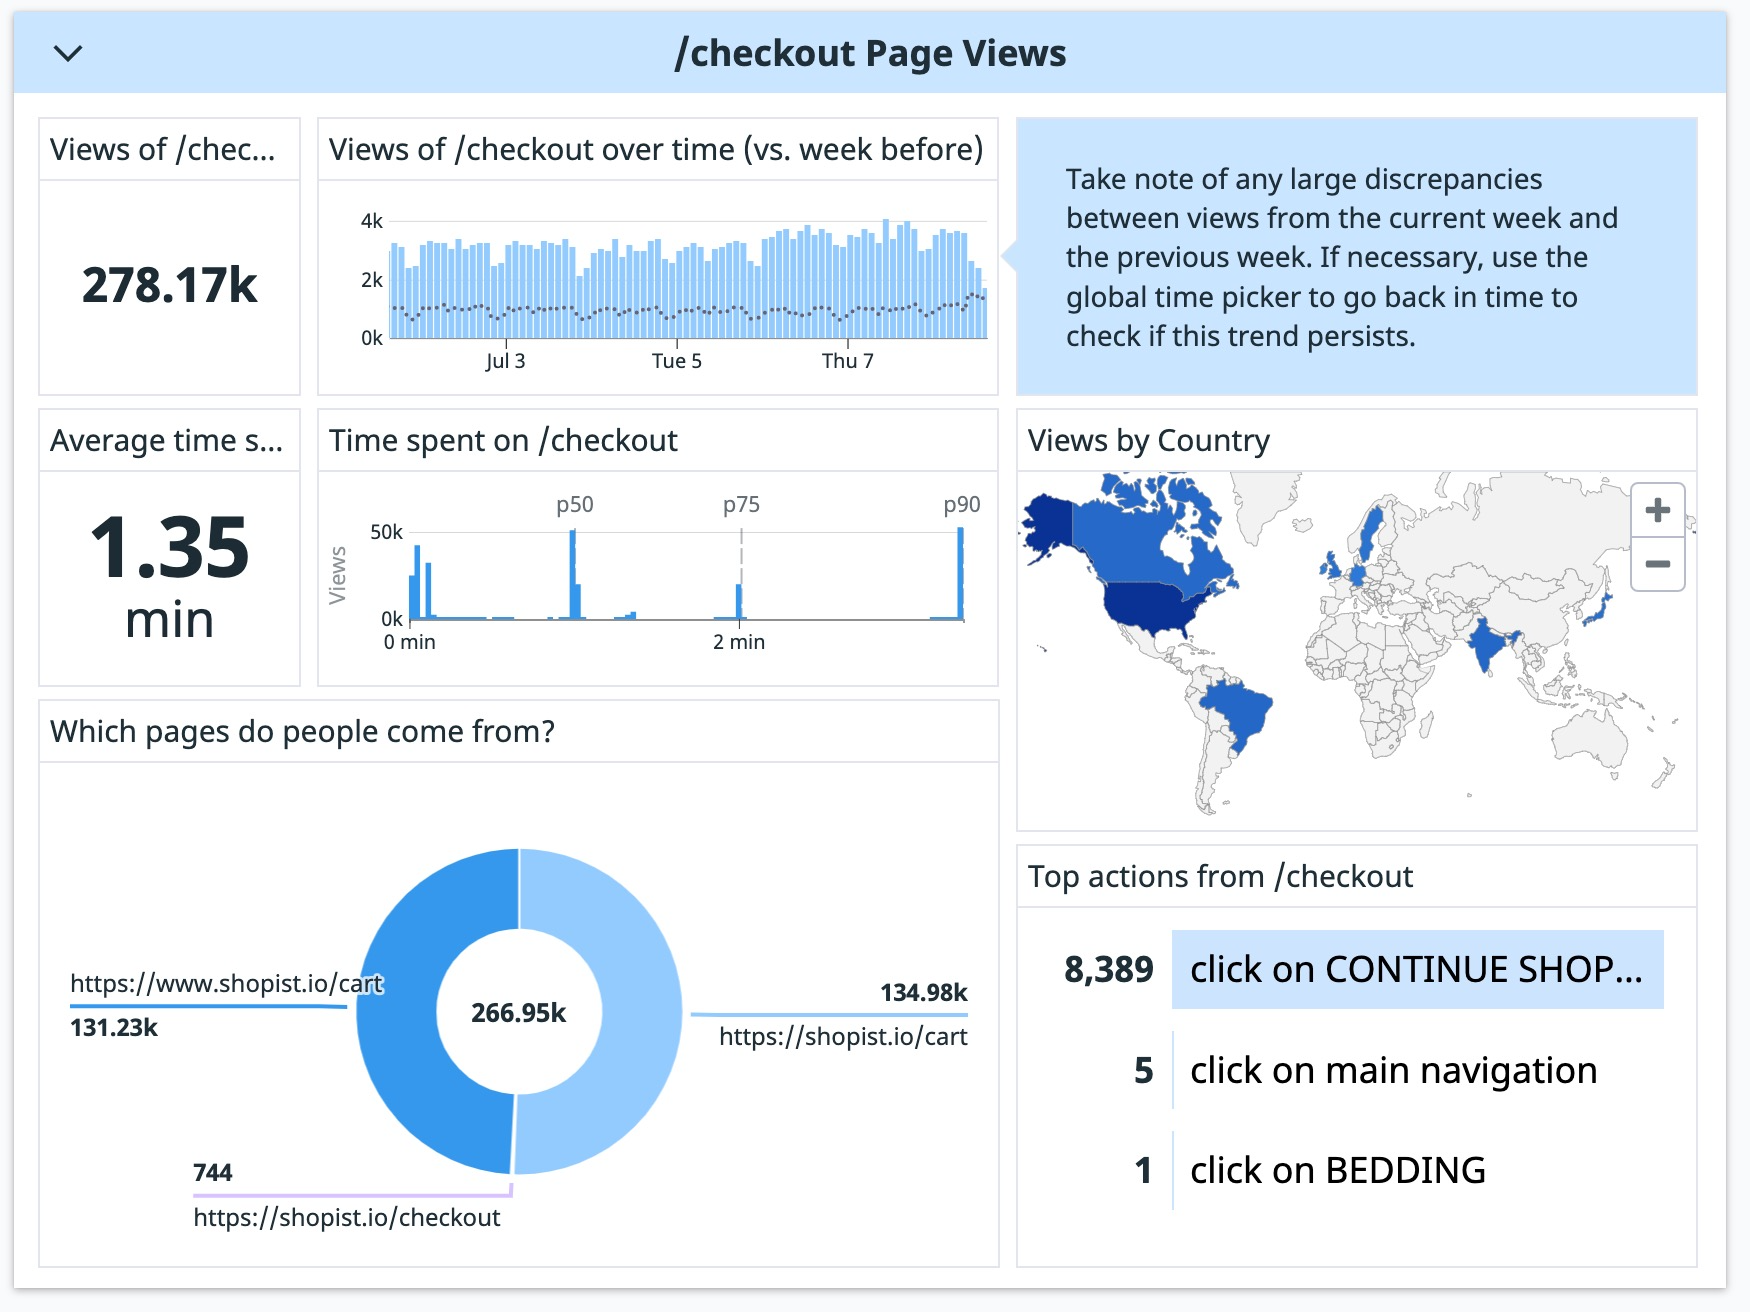
A note widget can give helpful context on how to interpret a graph. For example, the RUM Page Views Powerpack describes how to compare the current week’s page views to the previous week’s. Notes can also link to external resources, like in the System Resource Utilization pack.
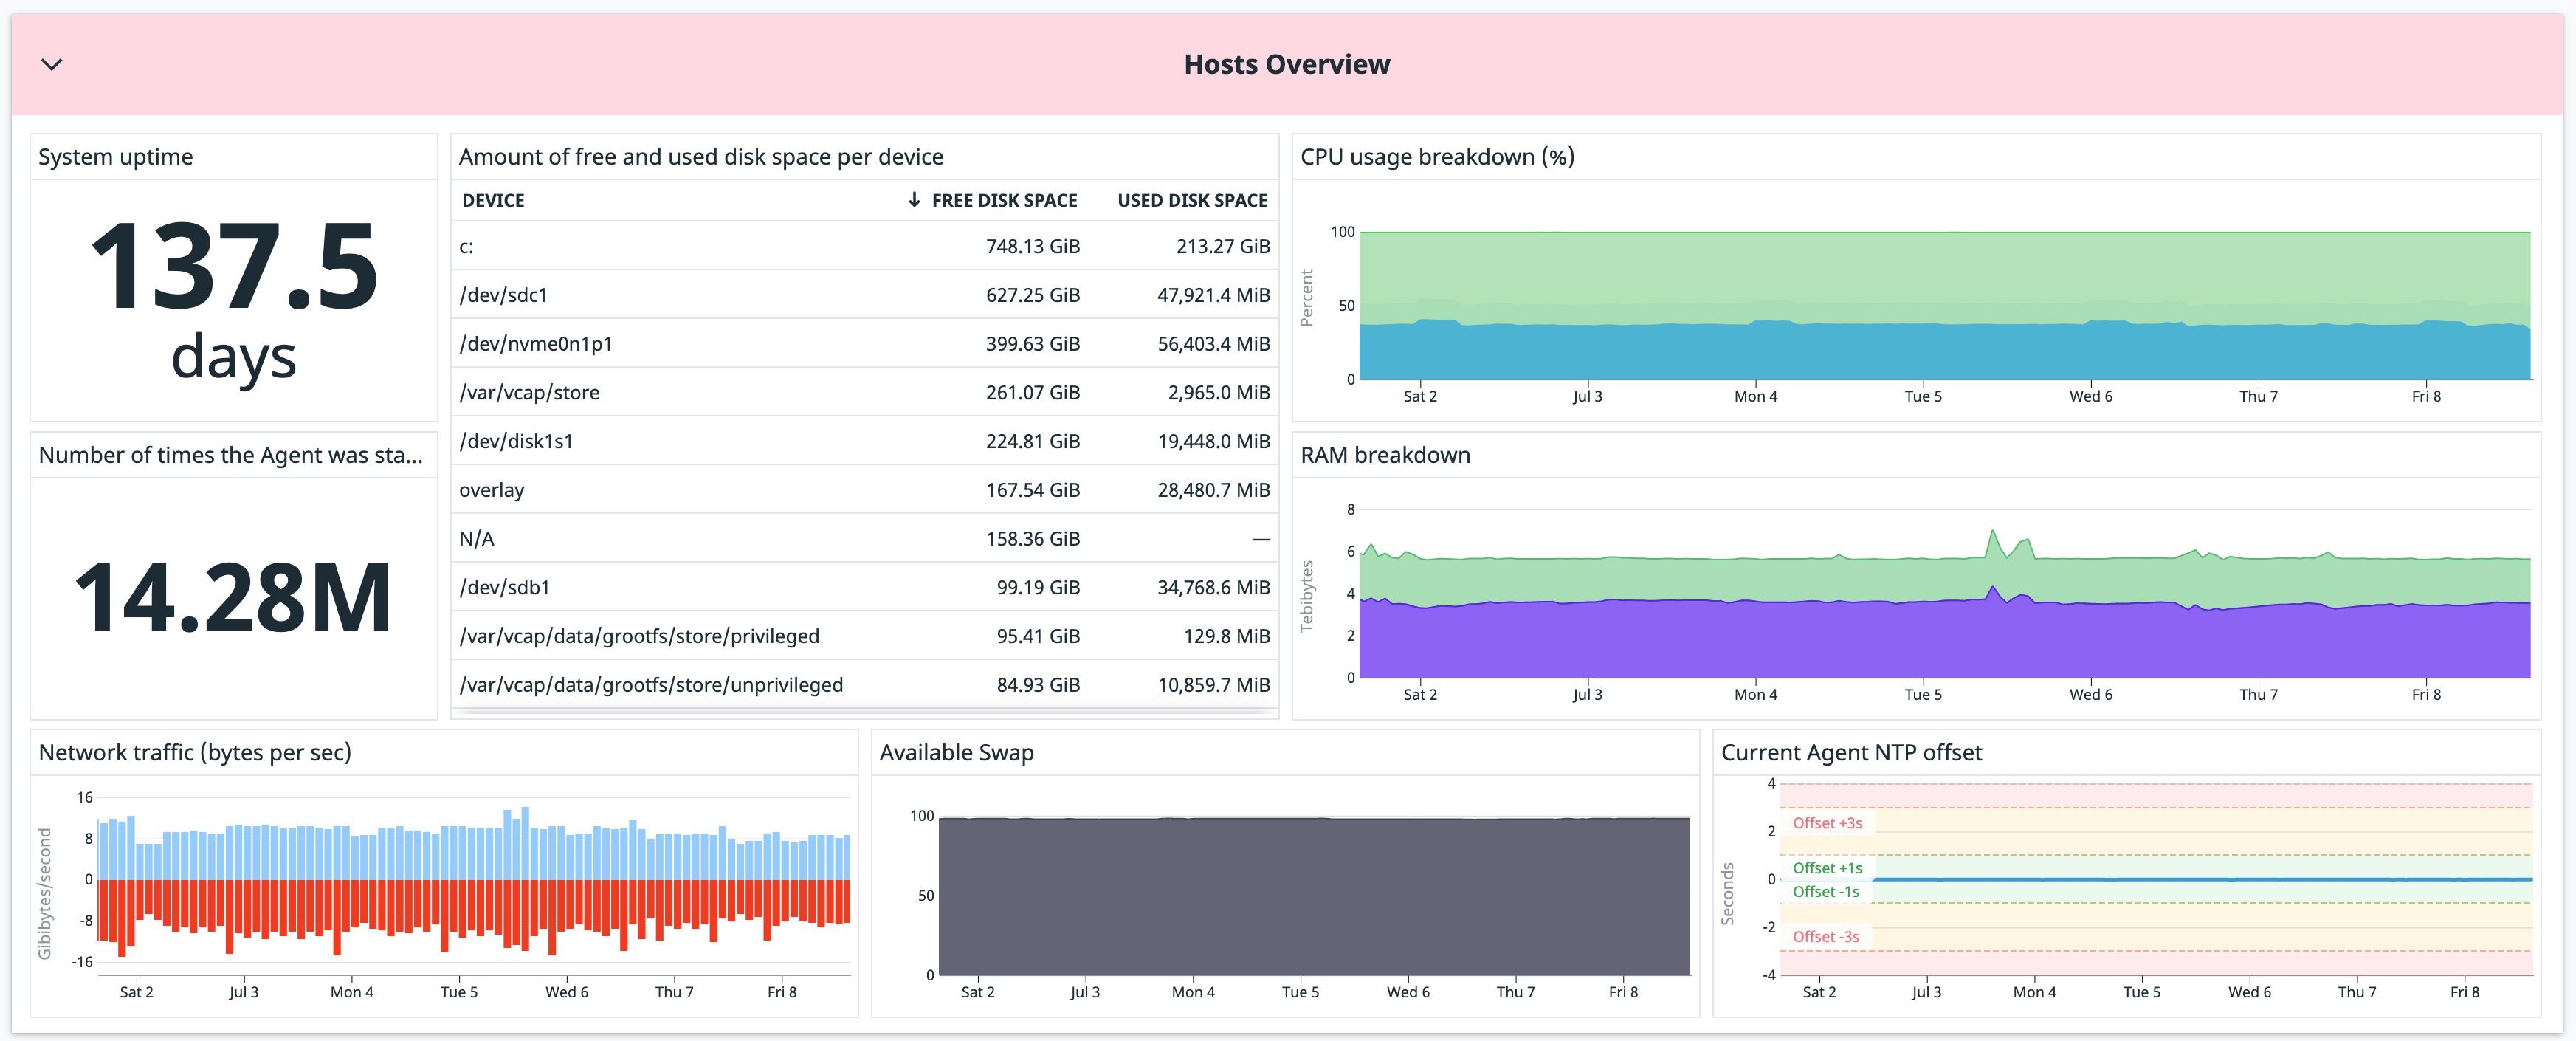
On-graph markers, like horizontal markers and forecast functions, can provide context on what a value means. For example, the Hosts Overview pack shows Agent NTP offsets where they appear on a graph. Horizontal markers reduce the visual mapping a viewer has to do by clearly defining acceptable thresholds on a graph.
Make Powerpacks discoverable
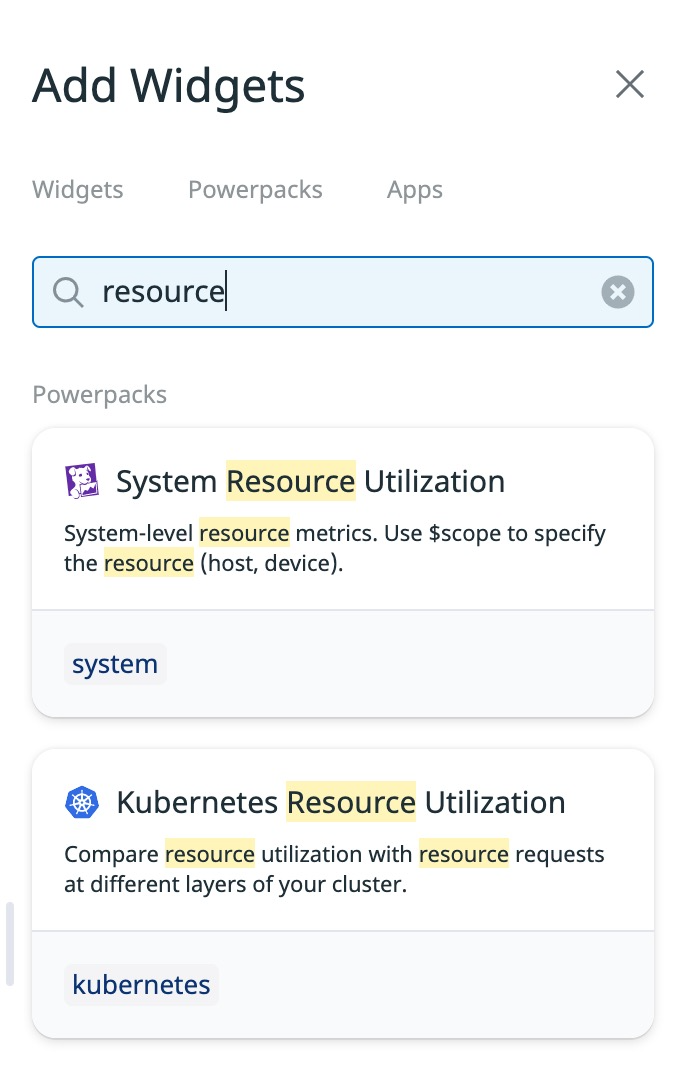
Powerpacks appear in the dashboard widget tray and you can find them through keyword or tag searches. Powerpack title, description, and tags are all searchable fields and provide the easiest way for someone to find your Powerpack.
To ensure the right users find your Powerpack, include keywords your users might search (such as “performance”) in the title or description, and tag key technologies.
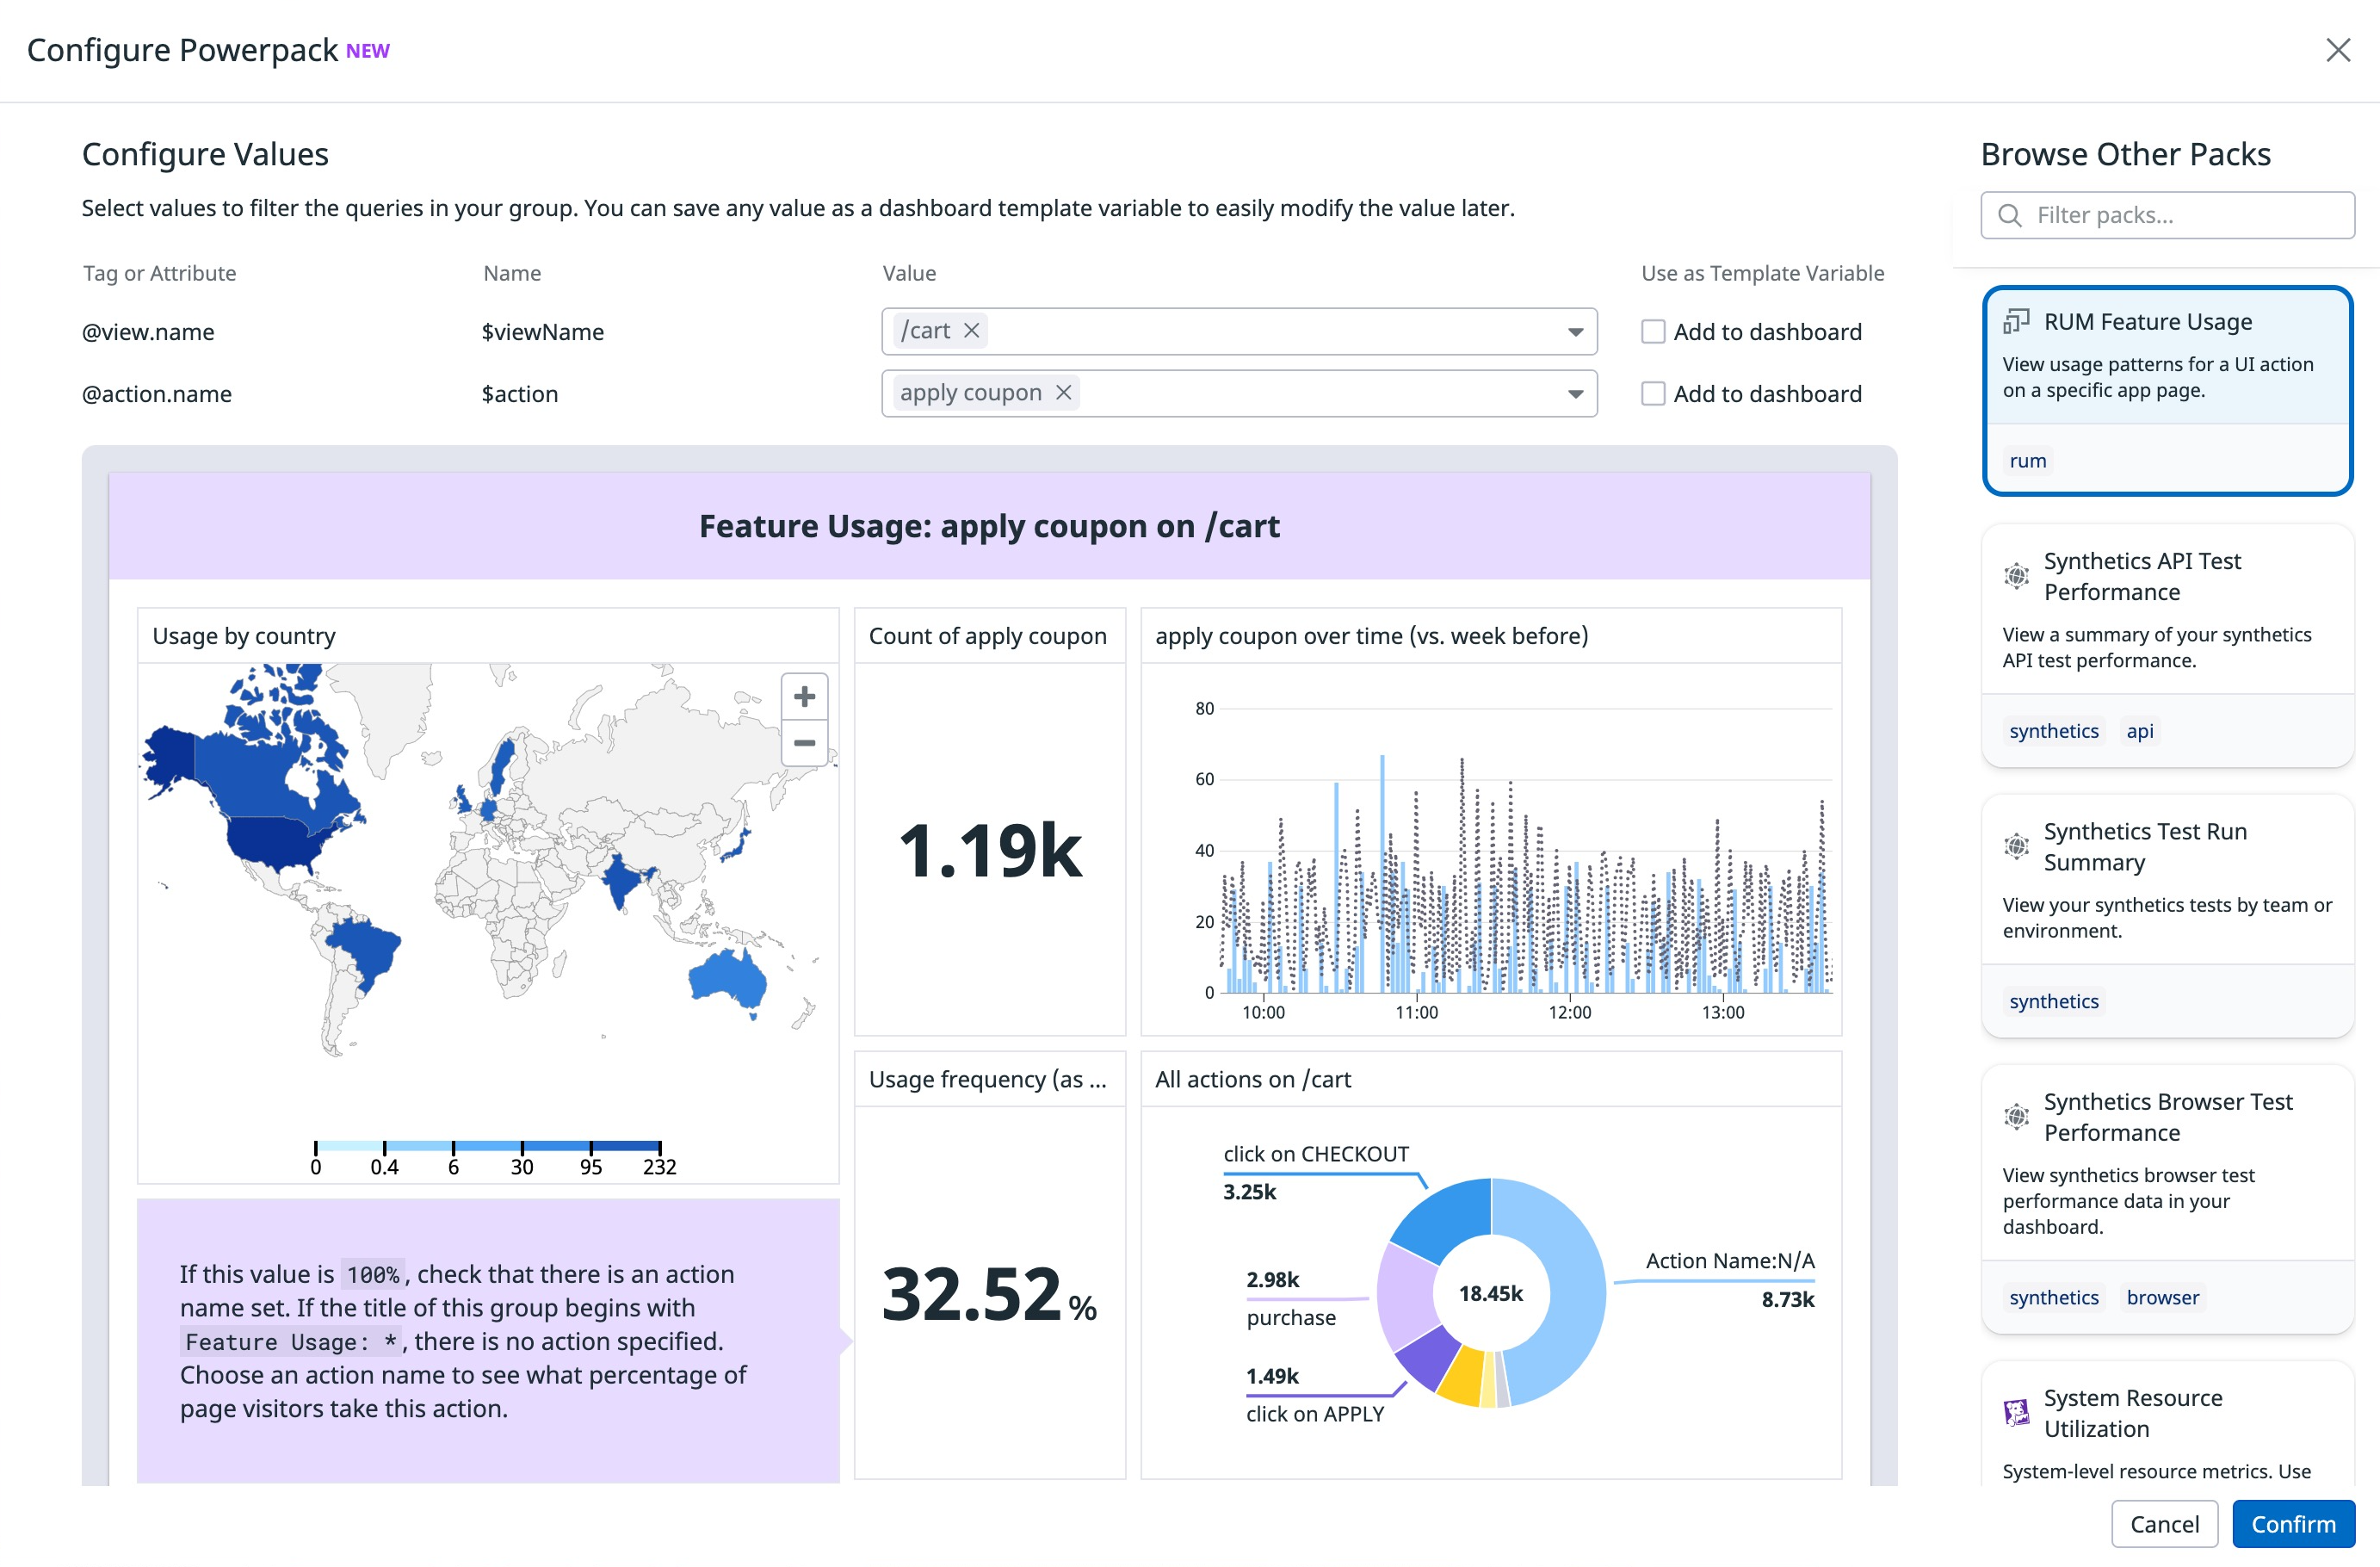
Descriptions are limited to 80 characters. A good description provides a brief summary of what a pack is for and how someone can use it. For example, “View usage patterns for a UI action on a specific app page” for RUM Feature Usage describes what the Powerpack tracks, what it expects as an input (a specific app page), and includes keywords like “usage,” “UI,” and “app”.
Tagging Powerpacks
Use tags to specify key technologies or search phrases for a specific pack (for example, aws, k8s, app). Use plain strings to describe the content of the packs; avoid putting key:value pairs in the tag field directly. Tags are limited to 80 characters.
To search Powerpacks by tag in the widget tray, use tag:search_string syntax.
Make Powerpacks customizable
Powerpacks are most useful when they can be customized by each team into their relevant context. Set configuration variables to allow this.
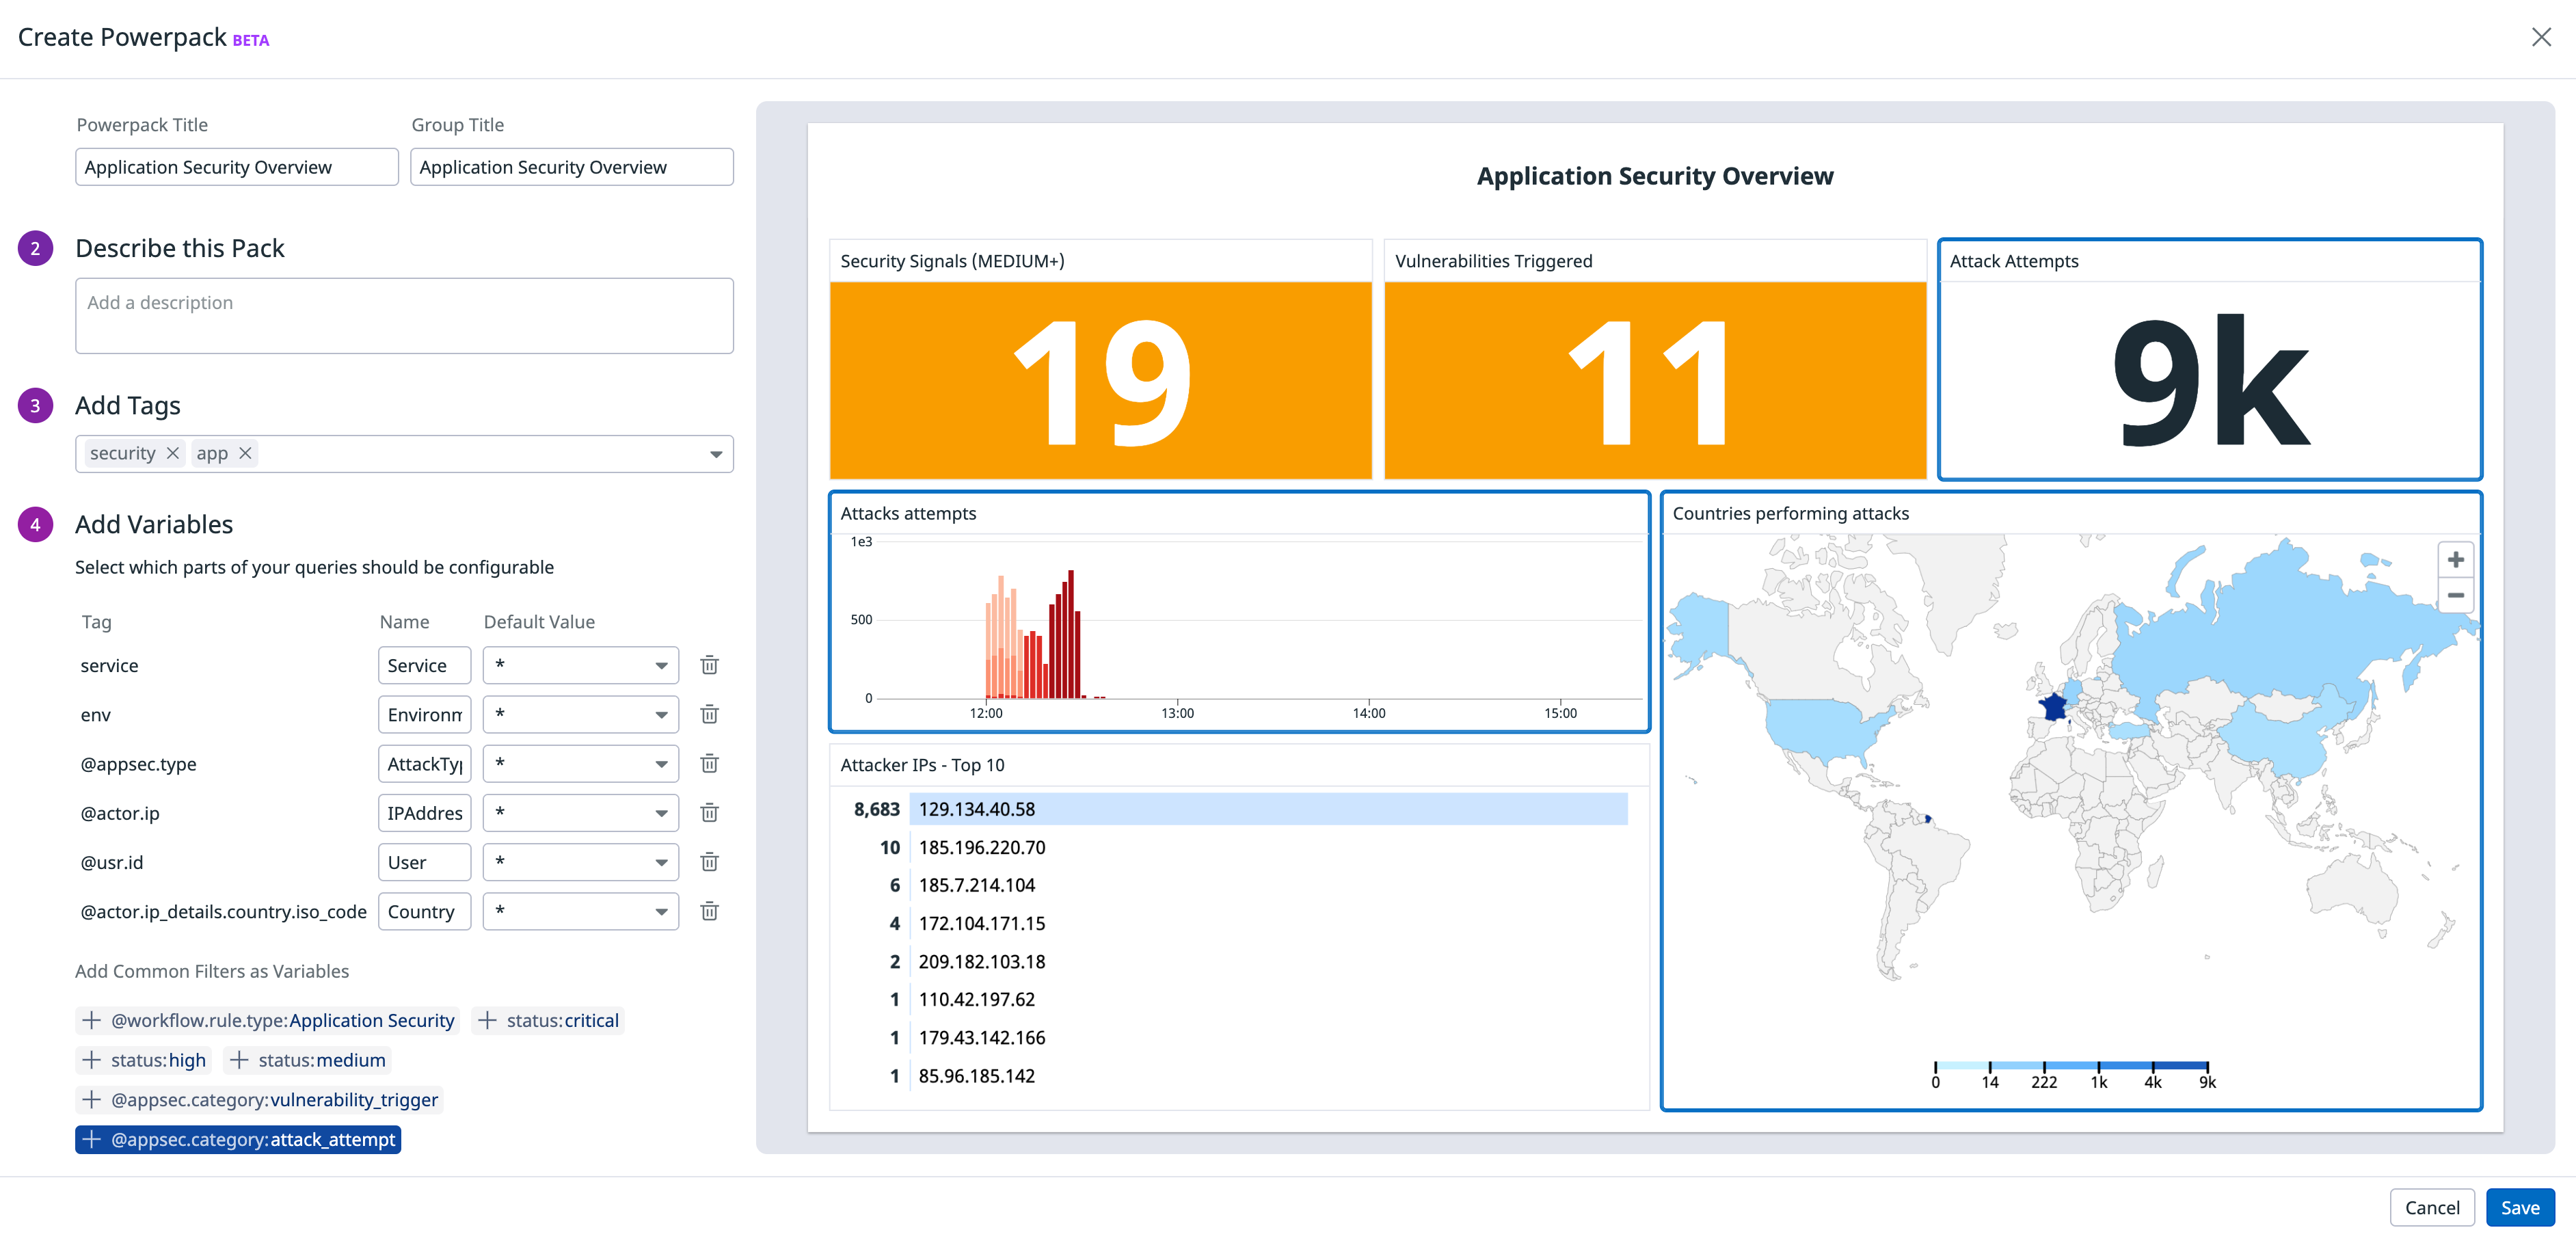
The Powerpack creation modal suggests variables to add to your pack based on common filters that appear in queries. Hover over any suggested variable to see which graphs it affects. To add a variable that is not suggested, modify your graphs directly in the dashboard to use the desired variable as a filter or as a template variable.
Modify the names of variables to clarify how others should use them. In the example below, @appsec.type is renamed AttackType to clarify the expected input.
Configuration variables serve two purposes. They can:
- Help a team scope a Powerpack to their context once, before the pack gets added to their dashboard (such as selecting a
serviceto ensure a security Powerpack is relevant to the correct service). - Allow users to filter a Powerpack after the pack gets added to a dashboard (such as viewing security signals in a Powerpack in both
prodandstagingenvironments).
Each Powerpack user decides whether to save a variable to their dashboard to allow dynamic filtering. In the example below, the user is able to change the value of $Environment on their dashboard through a template variable, but $Service is always set to agent.
Updating a Powerpack
Changes made to an existing custom Powerpack are reflected across all instances of the same Powerpack. This can simplify the process of updating duplicate content across several dashboards. Click Edit Powerpack Layout to edit synced Powerpack instances.
Permissions
By default, edit permissions for Powerpacks are restricted to the author. Editing permission can be modified at any time through the kebab menu in the widget tray or in the header of a Powerpack instance.
Spread the word
Once your Powerpack is created, let your organization know about it. Communicating about your pack both announces the pack and provides a channel for any questions. Share the name of your Powerpack with your organization through communication channels like email or messaging platforms, specify who the pack is intended for, and describe where you expect it to appear.
Further Reading
Additional helpful documentation, links, and articles:
