- Essentials
- Getting Started
- Glossary
- Standard Attributes
- Guides
- Agent
- Integrations
- Developers
- Authorization
- DogStatsD
- Custom Checks
- Integrations
- Create an Agent-based Integration
- Create an API Integration
- Create a Log Pipeline
- Integration Assets Reference
- Build a Marketplace Offering
- Create a Tile
- Create an Integration Dashboard
- Create a Monitor Template
- Create a Cloud SIEM Detection Rule
- OAuth for Integrations
- Install Agent Integration Developer Tool
- Service Checks
- IDE Plugins
- Community
- Guides
- OpenTelemetry
- Administrator's Guide
- API
- Datadog Mobile App
- CoScreen
- CoTerm
- Cloudcraft (Standalone)
- In The App
- Dashboards
- Notebooks
- DDSQL Editor
- Reference Tables
- Sheets
- Monitors and Alerting
- Metrics
- Watchdog
- Bits AI
- Software Catalog
- Error Tracking
- Change Tracking
- Service Management
- Actions & Remediations
- Infrastructure
- Cloudcraft
- Resource Catalog
- Universal Service Monitoring
- Hosts
- Containers
- Processes
- Serverless
- Network Monitoring
- Cloud Cost
- Application Performance
- APM
- Continuous Profiler
- Database Monitoring
- Agent Integration Overhead
- Setup Architectures
- Setting Up Postgres
- Setting Up MySQL
- Setting Up SQL Server
- Setting Up Oracle
- Setting Up Amazon DocumentDB
- Setting Up MongoDB
- Connecting DBM and Traces
- Data Collected
- Exploring Database Hosts
- Exploring Query Metrics
- Exploring Query Samples
- Exploring Database Schemas
- Exploring Recommendations
- Troubleshooting
- Guides
- Data Streams Monitoring
- Data Jobs Monitoring
- Digital Experience
- Real User Monitoring
- Synthetic Testing and Monitoring
- Continuous Testing
- Product Analytics
- Software Delivery
- CI Visibility
- CD Visibility
- Test Optimization
- Quality Gates
- DORA Metrics
- Security
- Security Overview
- Cloud SIEM
- Code Security
- Cloud Security
- App and API Protection
- Workload Protection
- Sensitive Data Scanner
- AI Observability
- Log Management
- Observability Pipelines
- Log Management
- Administration
Microsoft Teams
Overview
Integrate with Microsoft Teams to:
- Be notified of Datadog alerts and events in Microsoft Teams.
- Manage incidents from within Microsoft Teams.
- Mute triggered monitors directly from Microsoft Teams.
- Be notified of Datadog alerts and events in Microsoft Teams.
- Mute triggered monitors directly from Microsoft Teams.
Setup
Send monitor notifications to a Microsoft Teams channel
Connect your Microsoft tenant to Datadog.
- In Datadog, navigate to Integrations > Microsoft Teams.
- Click Add Tenant, which redirects you to Microsoft.
- Follow the prompts and click OK.
Ensure you have added the Datadog app to all teams where you want to receive Datadog notifications.
Ensure you have added the Datadog for Government app to all teams where you want to receive Datadog notifications.
- Open Microsoft Teams.
- In the vertical toolbar, click Apps.
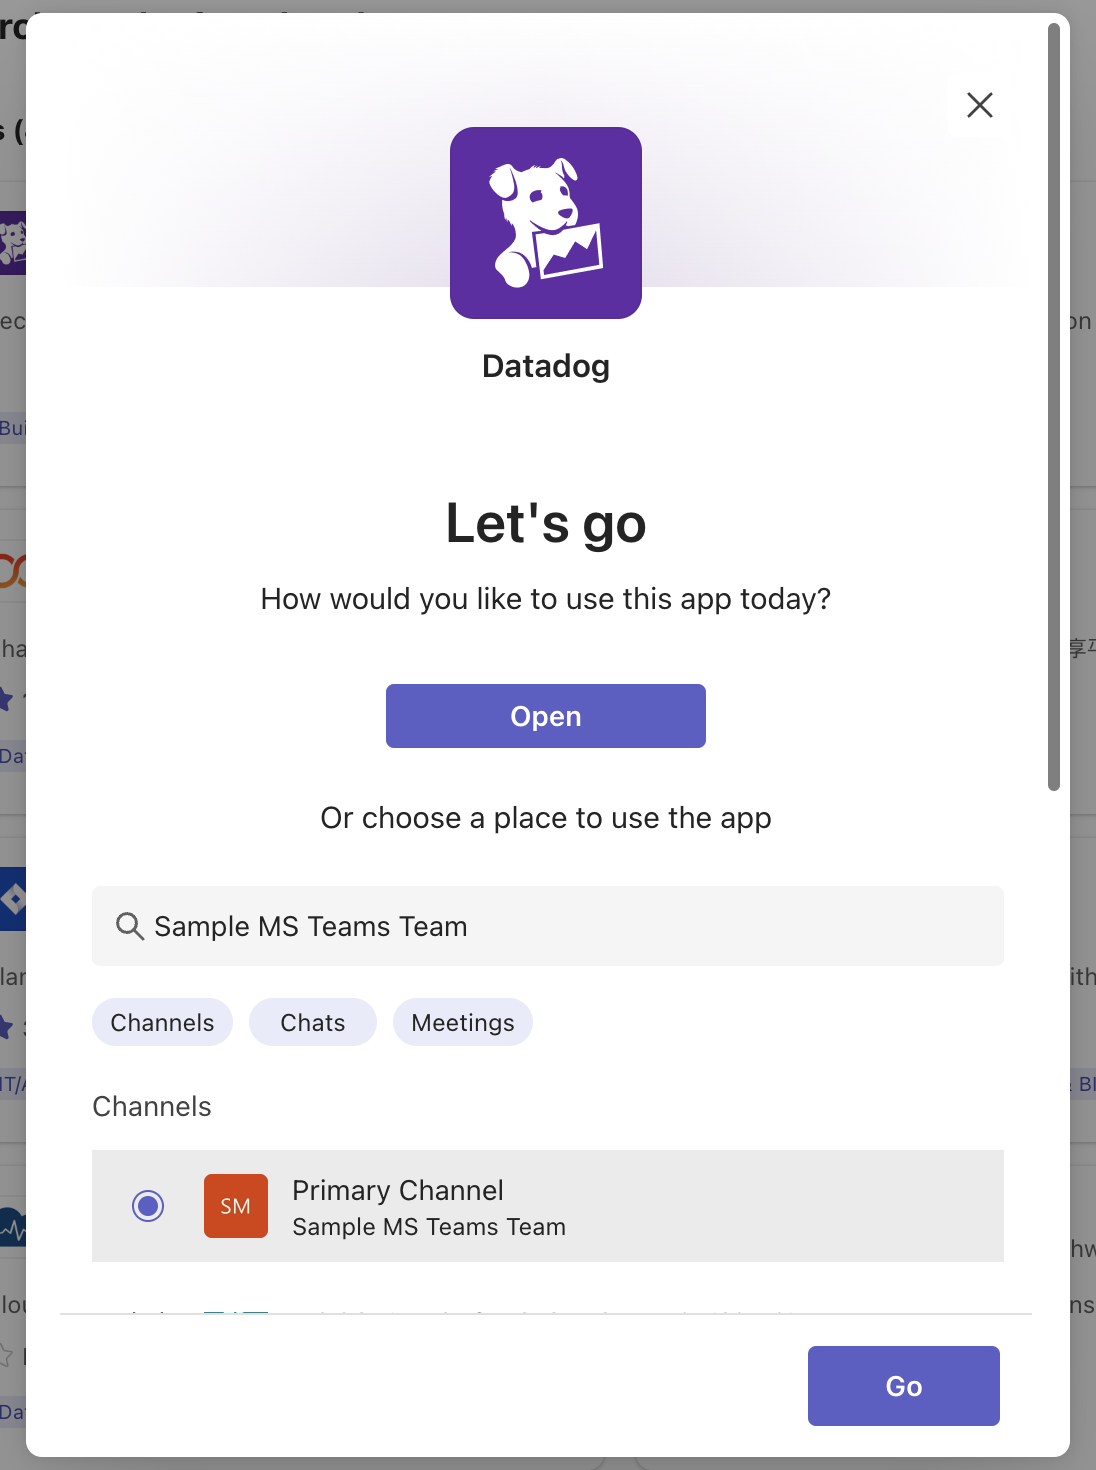
- Search for “Datadog” and click on Open.
- In the modal that opens, select the primary channel of the team where the app should be added. Click Go to complete the installation.
- Open Microsoft Teams.
- In the vertical toolbar, click Apps.
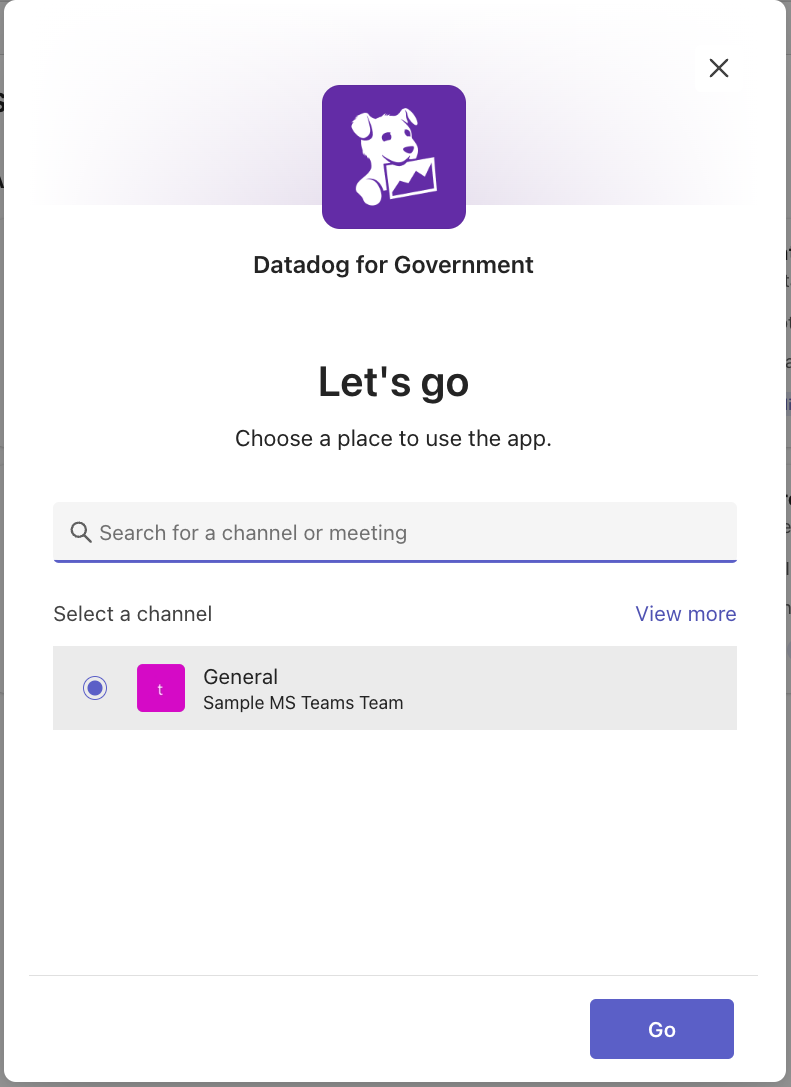
- Search for “Datadog for Government” and click on Open.
- In the modal that opens, select the primary channel of the team where the app should be added. Click Go to complete the installation.
Once the bot has been added to the team, configure the notification handle in Datadog.
- Under a configured tenant, click Add Handle. Give the handle a name, select the desired team and channel from the drop-down menus, and click Save.
Migrate legacy connectors to tenant-based integration
Microsoft has announced that Office 365 connectors for Microsoft Teams are being deprecated. This has the following effects:
- All Datadog Connectors will stop working on January 31, 2025.
- Incoming Webhook Connectors without updated URLs will stop working on January 31, 2025.
- All connectors will stop working on December 31, 2025 (previously October 1, 2024).
See Microsoft’s blog post for more information.
To migrate all notification handles currently using the legacy Office 365 connectors over to Datadog’s tenant-based integration:
- Follow the setup steps to connect your Microsoft tenant to Datadog.
- Add the Datadog app to all teams where you have a legacy Office 365 connector configured.
- For each legacy notification connector handle in the Microsoft Teams Integration Tile:
- Under the configured tenant, click Add Handle.
- Give the new handle the same name as the connector handle. For example, if your legacy connector handle is named
channel-123, create a new handle in the tenant configuration with the namechannel-123. - Select the desired team and channel from the drop-down menus that the legacy connector handle was sending the message to, and click Save. This new handle overrides the existing legacy connector handle.
- Follow the setup steps to connect your Microsoft tenant to Datadog.
- Add the Datadog for Government app to all teams where you have a legacy Office 365 connector configured.
- For each legacy notification connector handle in the Microsoft Teams Integration Tile:
- Under the configured tenant, click Add Handle.
- Give the new handle the same name as the connector handle. For example, if your legacy connector handle is named
channel-123, create a new handle in the tenant configuration with the namechannel-123. - Select the desired team and channel from the drop-down menus that the legacy connector handle was sending the message to, and click Save. This new handle overrides the existing legacy connector handle.
Usage
From a Datadog monitor, send a notification to Microsoft Teams using the @-notification feature. Send the notification to the address @teams-<HANDLE>, replacing <HANDLE> with the name of your Microsoft Teams handle. To mute a triggered monitor from Microsoft Teams, click Mute Monitor, select a Mute Duration, and click Mute.
User mentions
User mentions allow you to notify specific users in your Microsoft Teams channels when monitor alerts are triggered. This helps ensure that the right people are notified about important events. To mention a specific user, follow the steps below to find their User Principal Name (UPN).
Syntax: <at>{User Principal Name}</at>
Example: <at>{user@microsoft.com}</at>
Complete notification example: @teams-CHANNEL_NAME <at>{user@microsoft.com}</at> <at>{another.user@microsoft.com}</at>
To find a user’s User Principal Name:
- In Microsoft Teams, click on the user’s profile picture or name to open their contact card.
- The UPN is listed in the
Chatfield, which is usually (but not always) the user’s email address.
Datadog recommends testing your monitor notifications to ensure reliable delivery. See Test notifications for instructions.
Dashboards
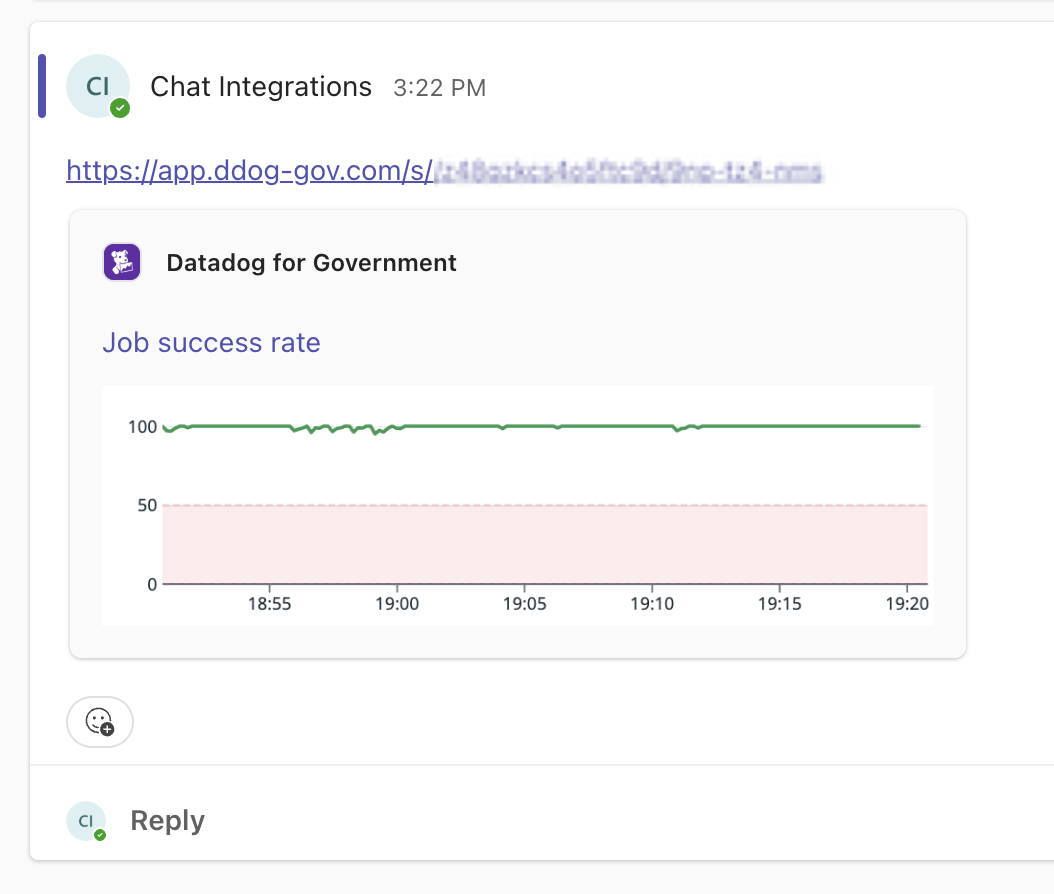
You can post dashboard widget snapshots on any team or chat. For a list of supported widgets, see [Scheduled Reports][7].
To share a dashboard widget in Teams:
- In Datadog, hover over a dashboard widget and press
CMD + CorCTRL + C, or click the Copy button from the share menu. - Paste the link into Teams.
Limit edit access
By default, all users have full access to connected Microsoft Teams tenants.
Use Granular Access Control to limit which roles can edit a specific tenant:
- While viewing a tenant, click the gear icon in the upper-right corner to open the settings menu.
- Select Permissions.
- Click Restrict Access. The dialog box updates to show that members of your organization have Viewer access by default.
- Use the dropdown to select one or more roles, teams, or users that can edit the Microsoft Teams tenant.
- Click Add. The dialog box updates to show that the role you selected has the Editor permission.
- Click Save.
Note: To maintain your edit access to the tenant, you must include at least one role you belong to before saving.
If you have edit access, you can restore general access to a restricted tenant by completing the following steps:
- While viewing the tenant, click the gear icon in the upper-right corner to open the settings menu.
- Select Permissions.
- Click Restore Full Access.
- Click Save.
To edit tenant permissions through the API:
- Navigate to the Microsoft Teams integration tile.
- Click the Tenants tab.
- Copy the tenant ID shown for the selected tenant.
- Use the Restriction Policies API, where the Resource Type is
integration-accountand the id ismicrosoft-teams:<tenant_id>.
What are Microsoft Workflows Webhooks?
Workflows / Power Automate is a Microsoft product for creating automated workflows. Microsoft Workflows can be used to send notifications with incoming webhooks. If you are unable to install the Datadog app in your Microsoft Teams tenant (recommended), or you want to send notifications to private channels, you can configure Datadog handles to send notifications to Microsoft Teams channels through Microsoft Workflows. This integration is intended for use with the following Microsoft Workflows template: Post to a channel when a webhook request is received
Are you migrating legacy connectors to the Microsoft Workflows Webhooks integration?
Microsoft has announced that Office 365 connectors for Microsoft Teams are being deprecated, and existing connector URLs will stop working on January 31, 2025. Microsoft promotes using incoming webhooks from Microsoft Workflows as a replacement for legacy connectors. Follow the steps below to migrate all notification handles currently using legacy Office 365 connectors over to Datadog’s Microsoft Workflows webhooks integration.
For each legacy notification connector handle in the Microsoft Teams Integration Tile:
- Follow the setup steps to create a workflow webhook handle for the desired Microsoft Teams channel.
- Under the Microsoft Workflows Webhooks section, give the new handle the same name as the connector handle it should replace. For example, if your legacy connector handle is named
channel-123, name your new handle in the Microsoft Workflows Webhooks section with the namechannel-123. This new handle overrides the existing legacy connector handle.
Create a Microsoft Workflows Webhook
Prerequisites
- When creating a new workflow, a Microsoft account is required for both ownership of the workflow and sending notifications to channels (these do not need to be the same Microsoft account).
- The account that owns the workflow (configured in step 2 below) is the account that can edit and renew the workflow. For easier shared access, use a service account.
- The account that sends notifications to channels (configured in step 8 below) posts as the user of the account. This account must be part of the team that you want to send notifications to. If sending notifications to a private channel, then this account must be also be added to the channel. If you want to give this account a name like “Datadog Notifications,” use a service account.
Instructions
Note: Most of these steps are in Microsoft Workflows. As Microsoft makes changes to Workflows, the steps below may not reflect the most recent changes.
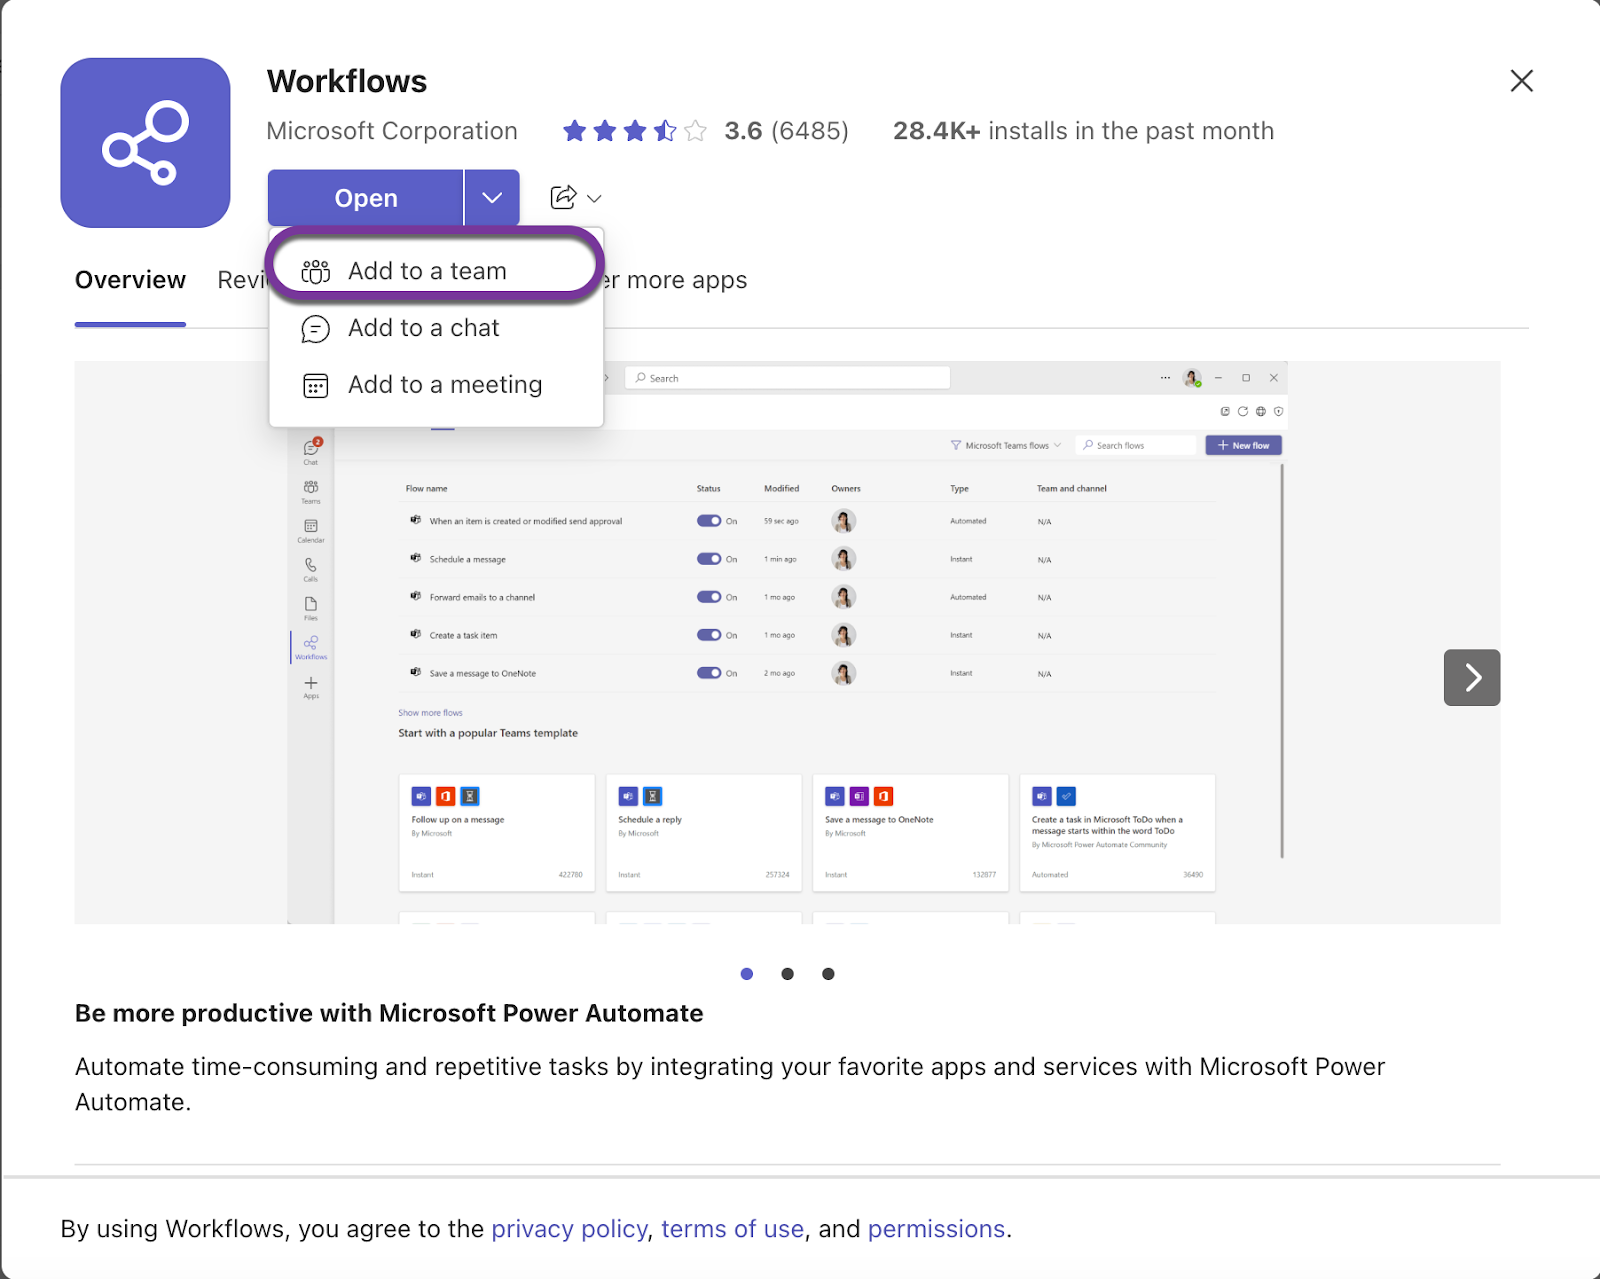
In Microsoft Teams, add the Workflows app to all teams you want to notify. If you are unable to add the app to your team, follow the instructions in the “Private channels” section below.
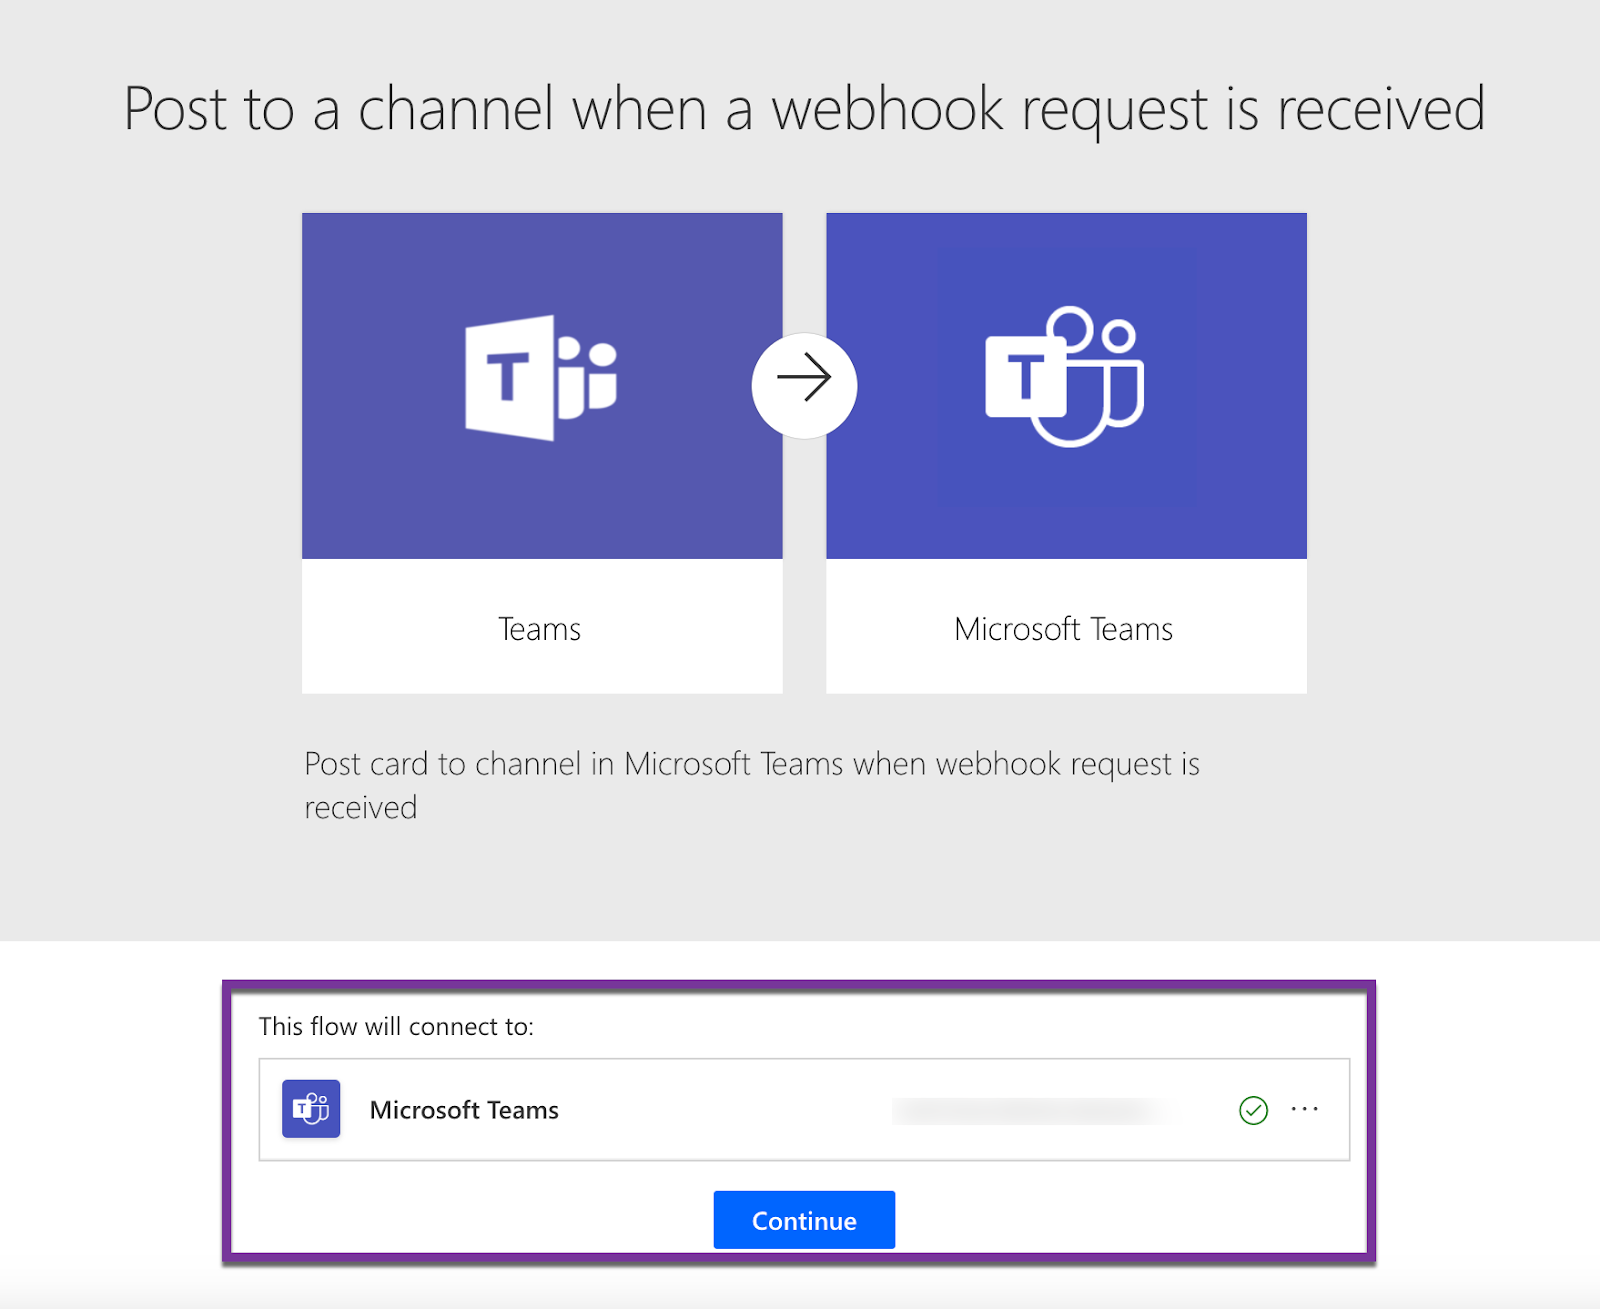
Create a new workflow in Power Automate from Microsoft’s Post to a channel when a webhook request is received template.
Choose the Microsoft account that you would like to use to own the workflow (use a service account for easier shared access), then click Continue.
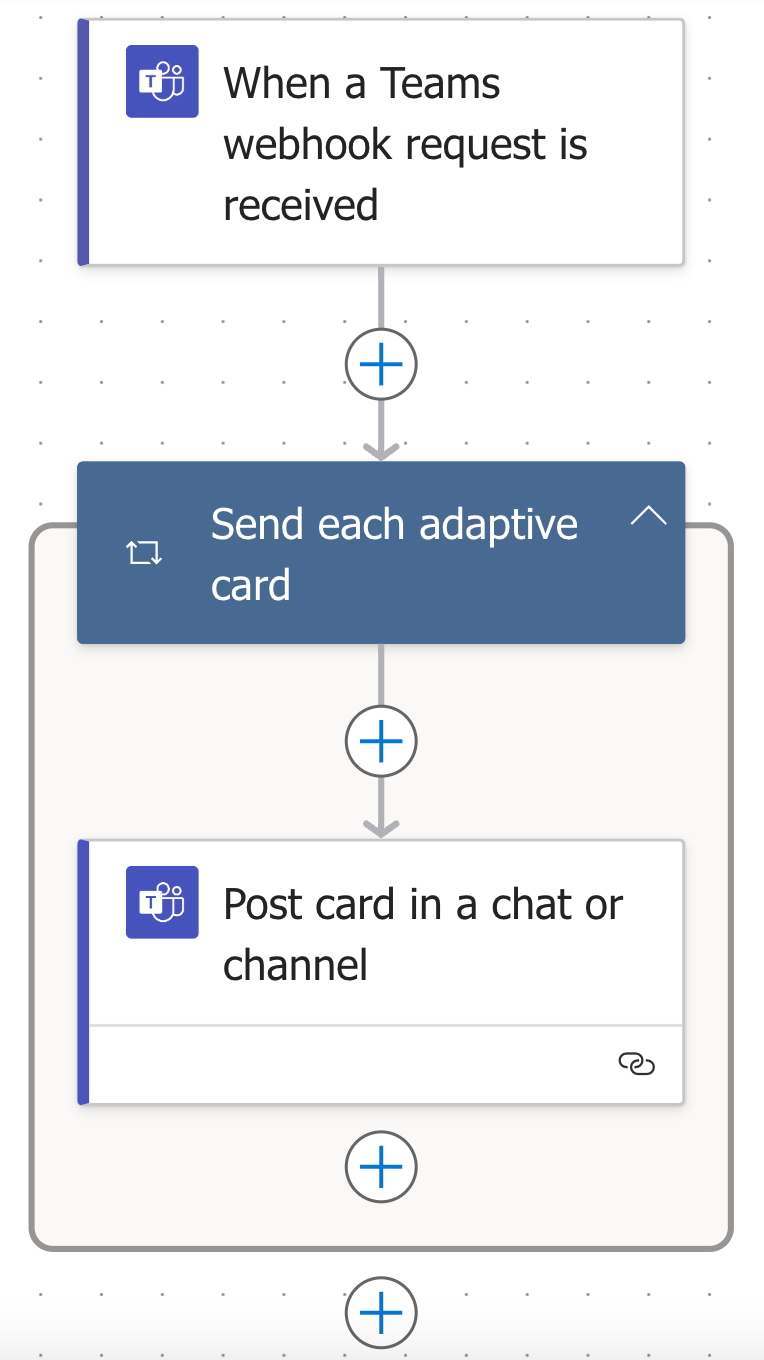
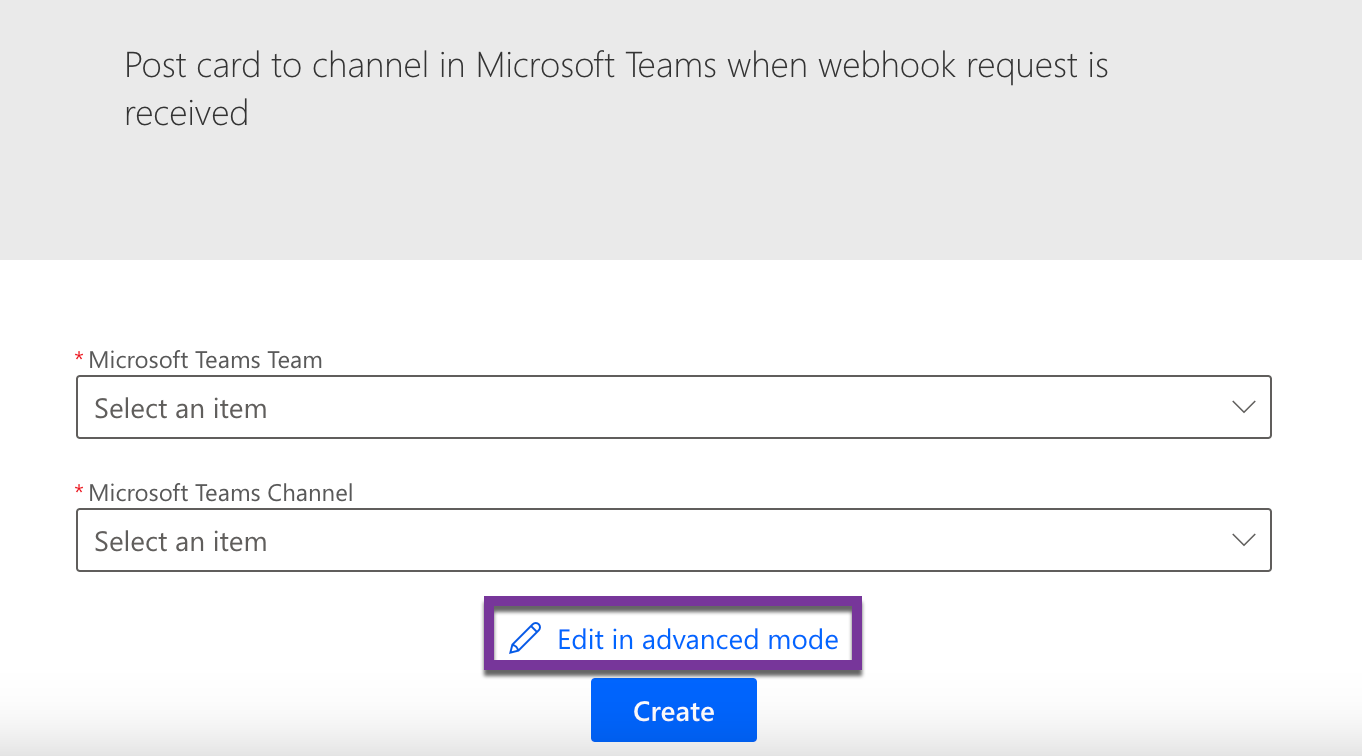
Click Edit in advanced mode.
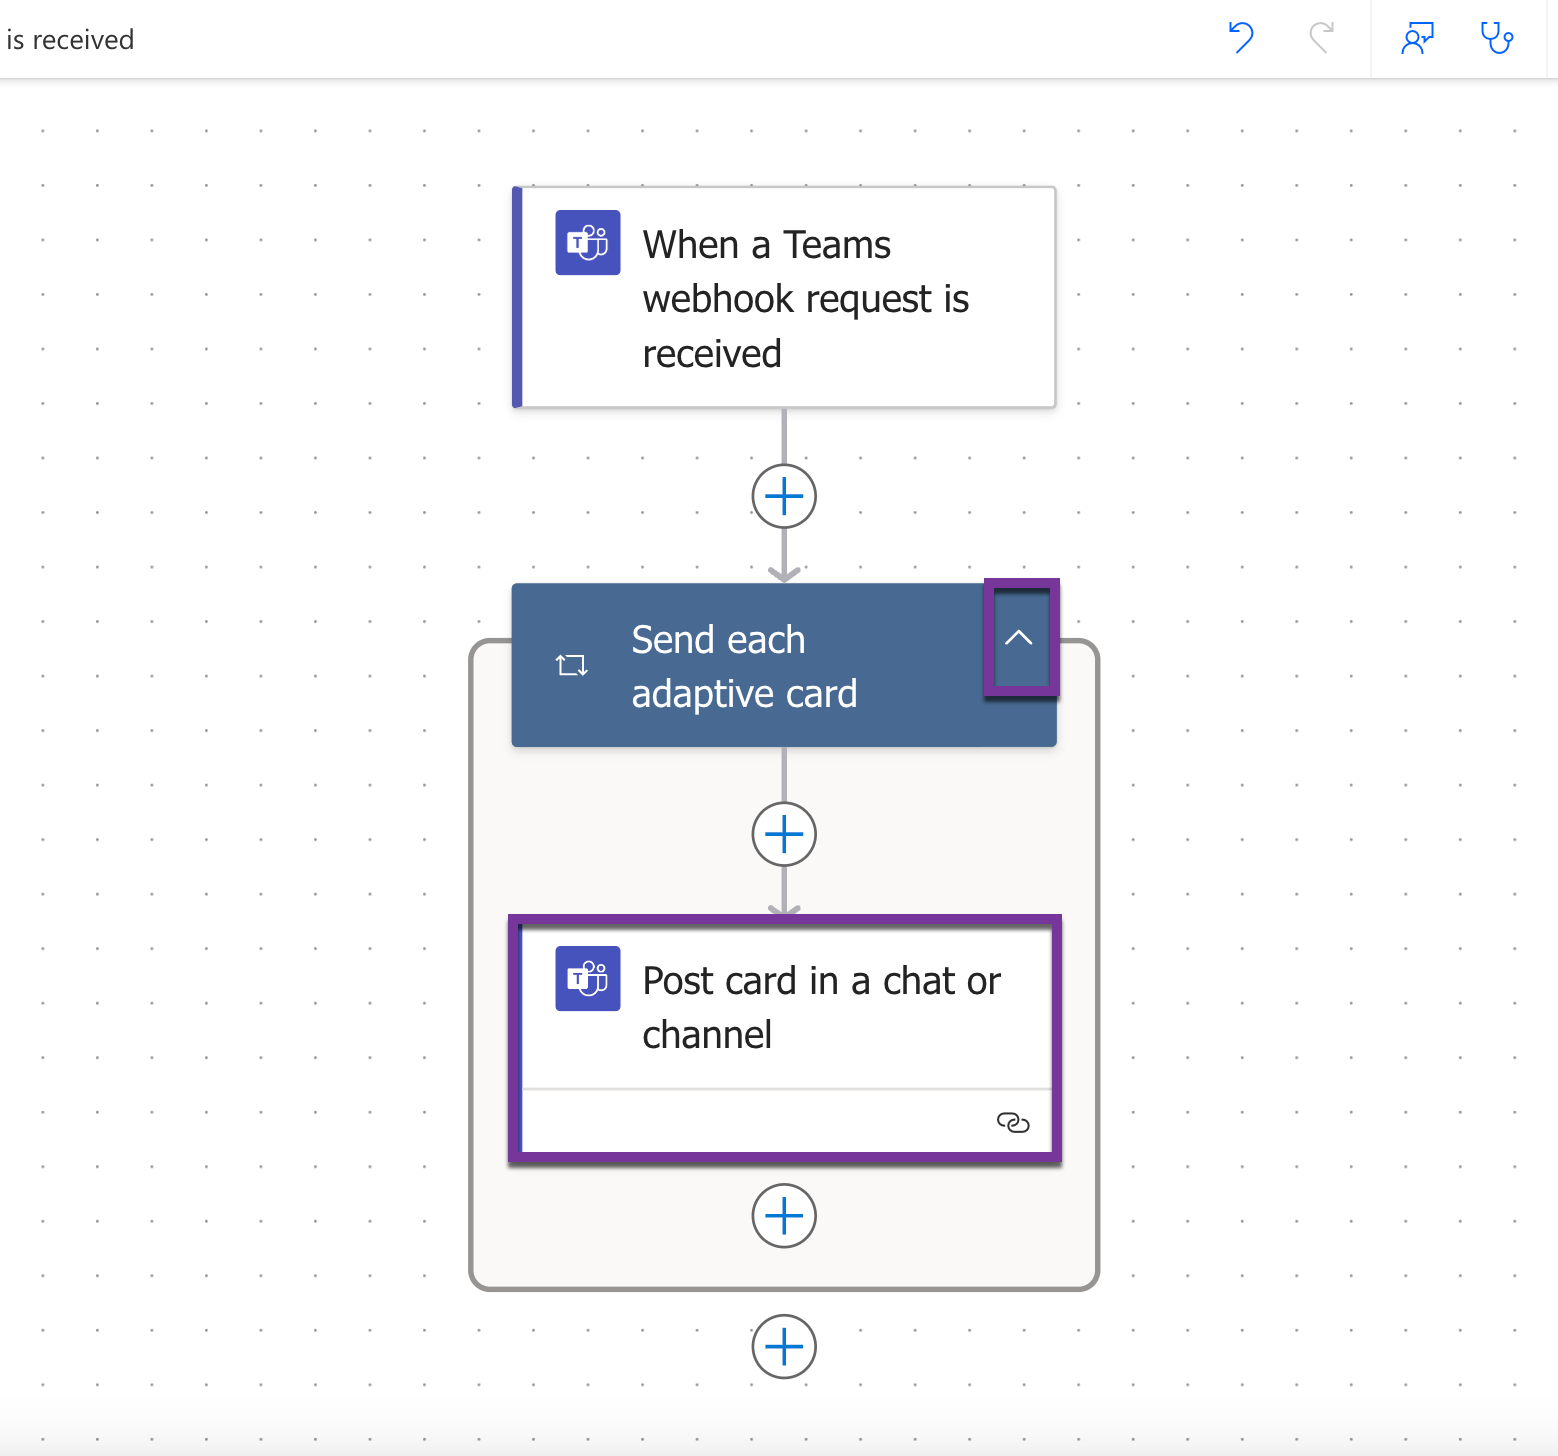
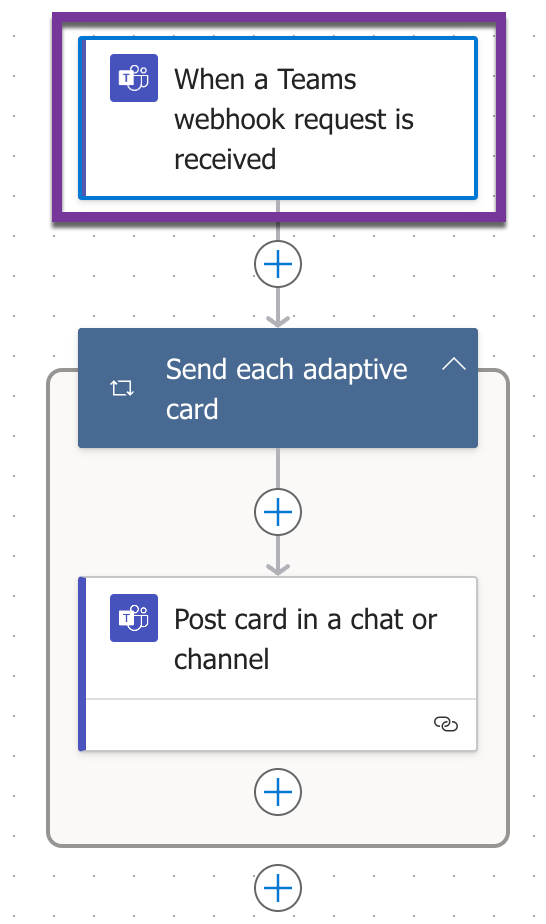
Expand Send each adaptive card, then click Post card in a chat or channel.
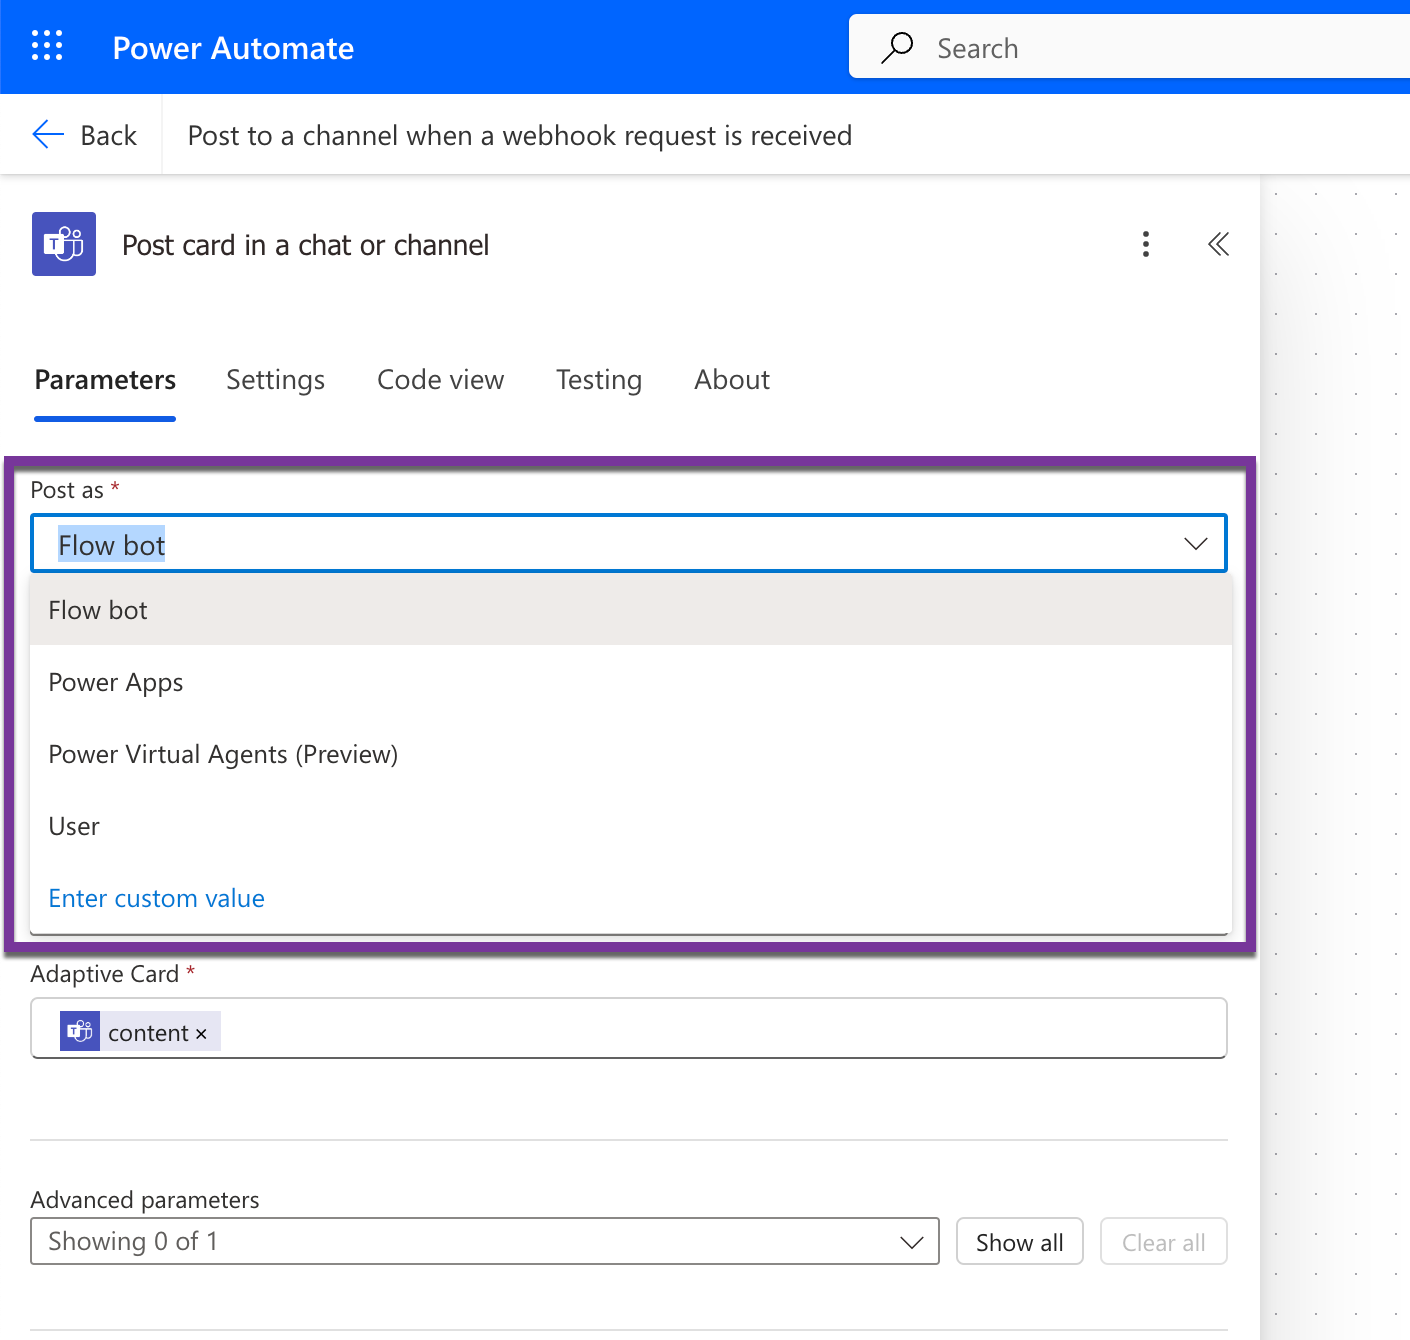
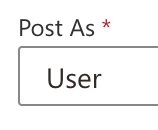
Use the Post As dropdown to set Post as to Flow bot. Notifications will appear to be sent by “
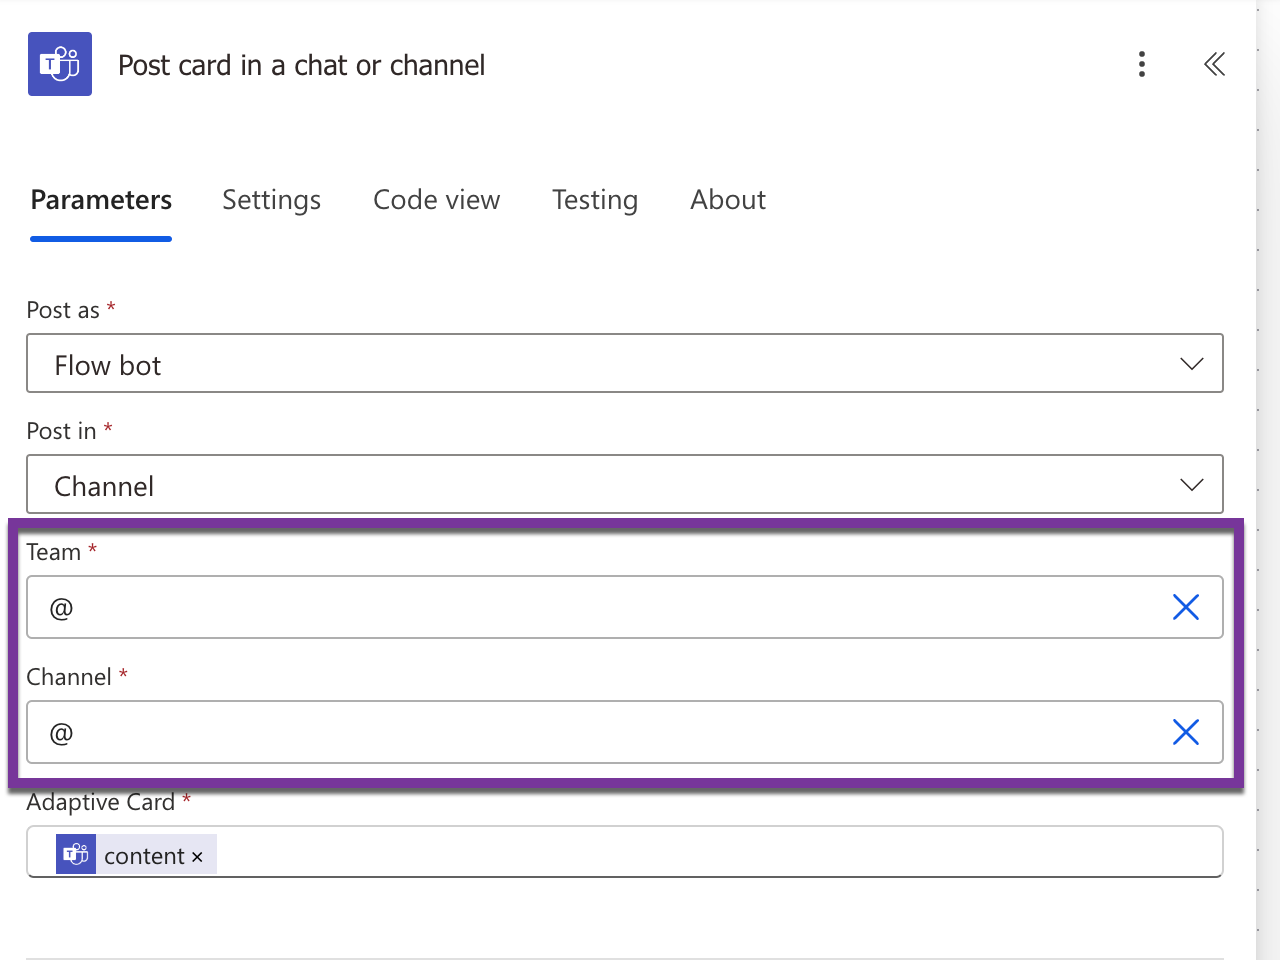
<NAME>via Workflows”. To receive these notifications, the Workflows application must be added to the desired team. If sending notifications to a private channel, Post As must be set to a user in the channel. See the “Private channels” section below for more information. Note: Changing Post as will reset the Post in field.To access the team and channel drop-downs, remove the @ symbols by deleting them or clicking the X icons.
Use the drop-downs to select the desired team and channel.
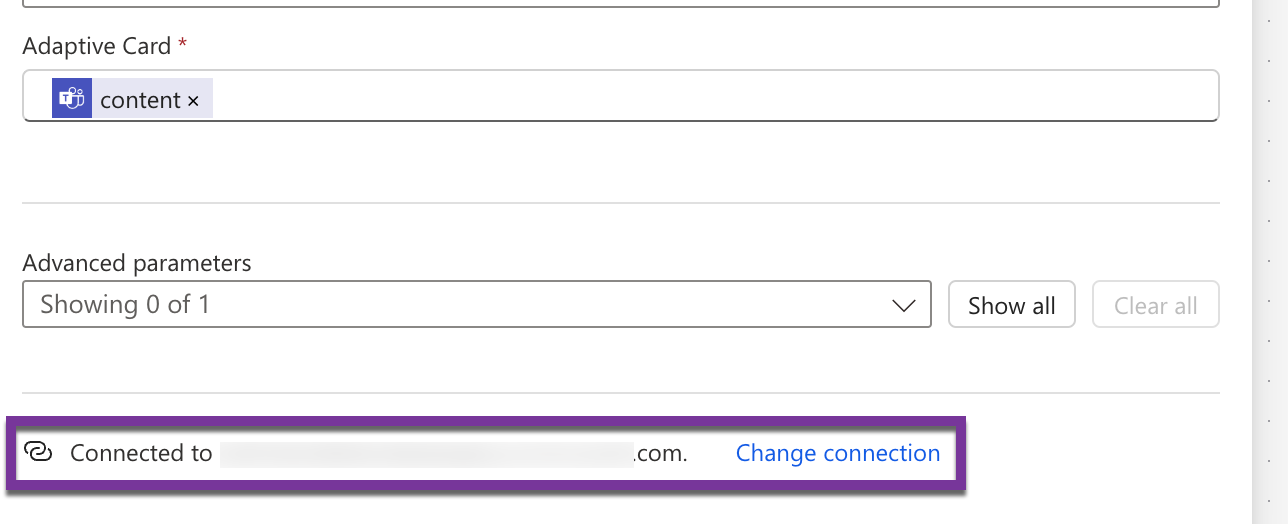
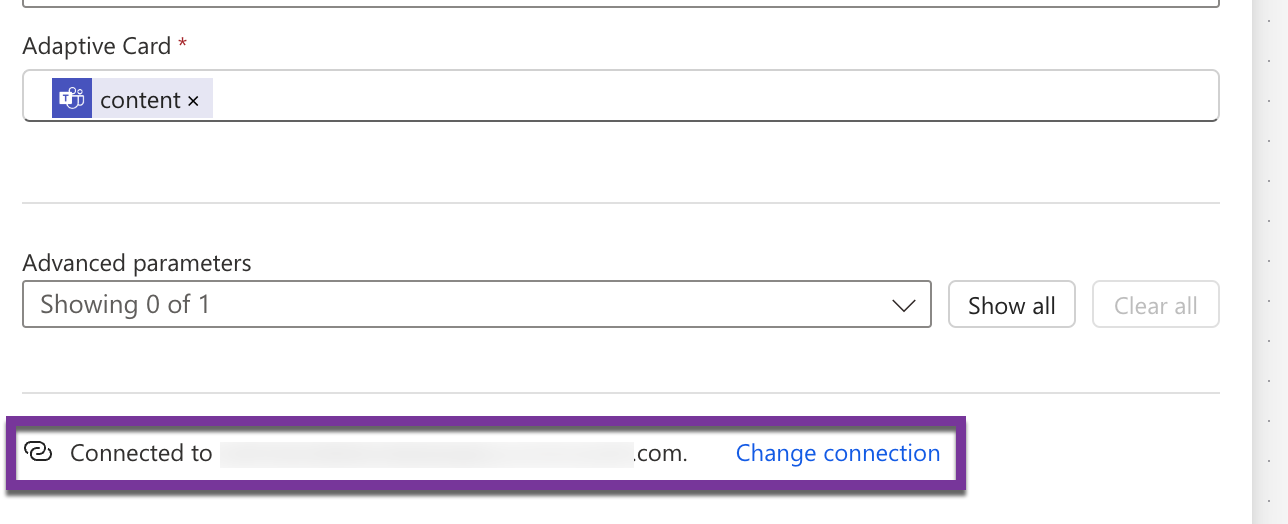
Ensure that the workflow is connected to the intended Microsoft account for sending notifications (such as a service account named “Datadog Notifications”). Notifications will appear to be sent by “
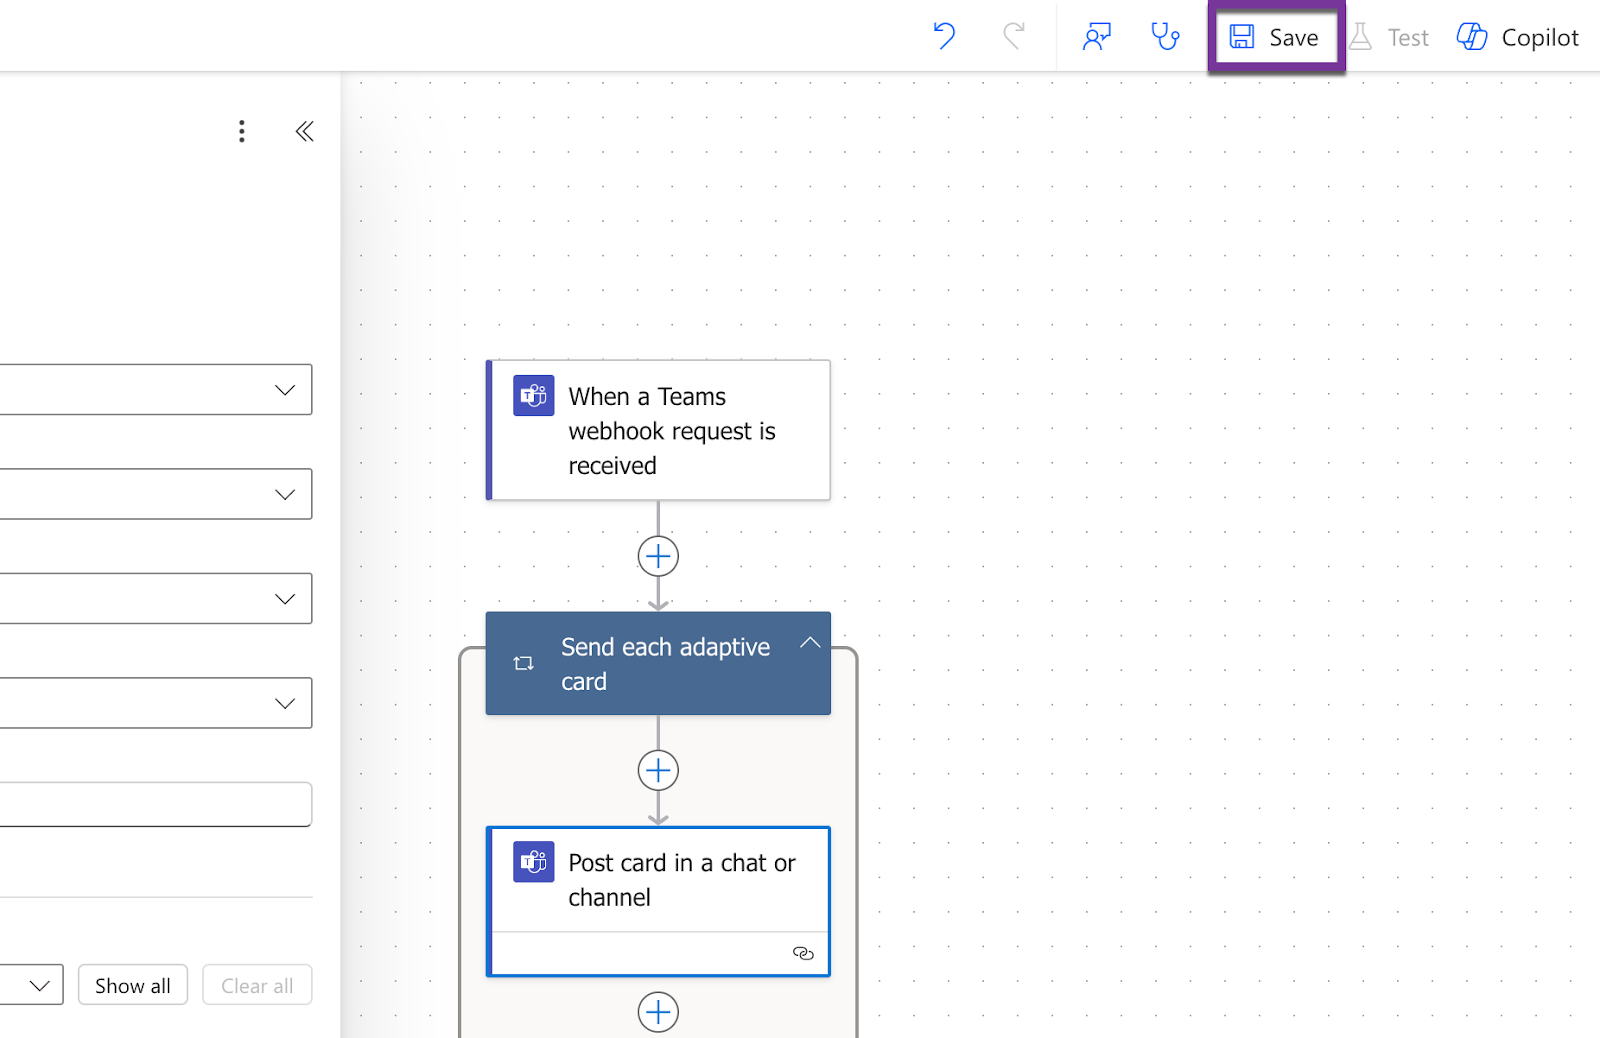
<NAME>through Workflows”. This account must have access to the configured Microsoft Teams channel. To change the account, click Change connection and follow the prompts to configure another Microsoft account.Click the Save button.
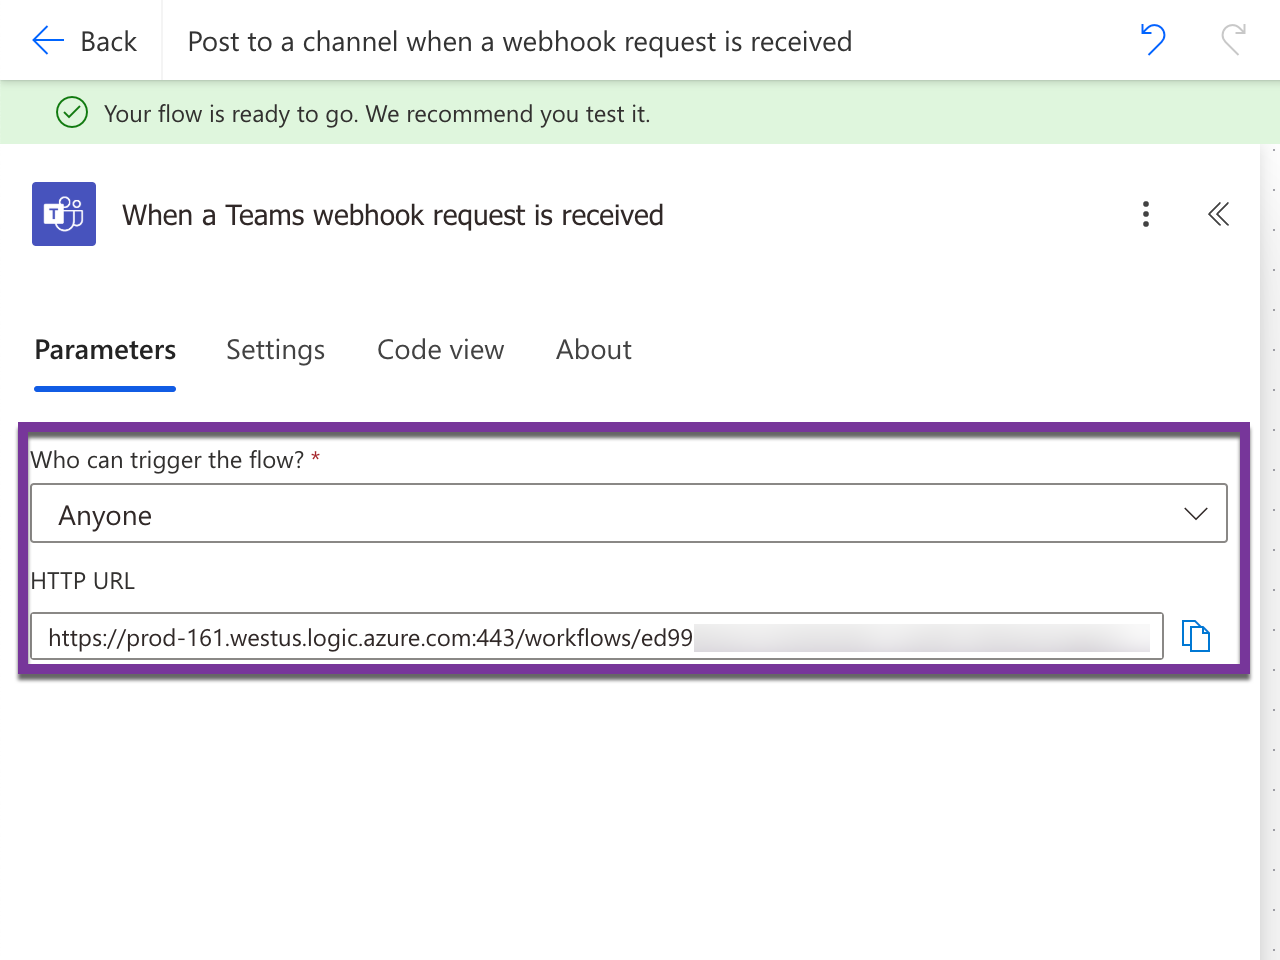
To find your webhook link, click the first block of the workflow.
Make sure that Anyone can trigger the flow, and then copy the link.
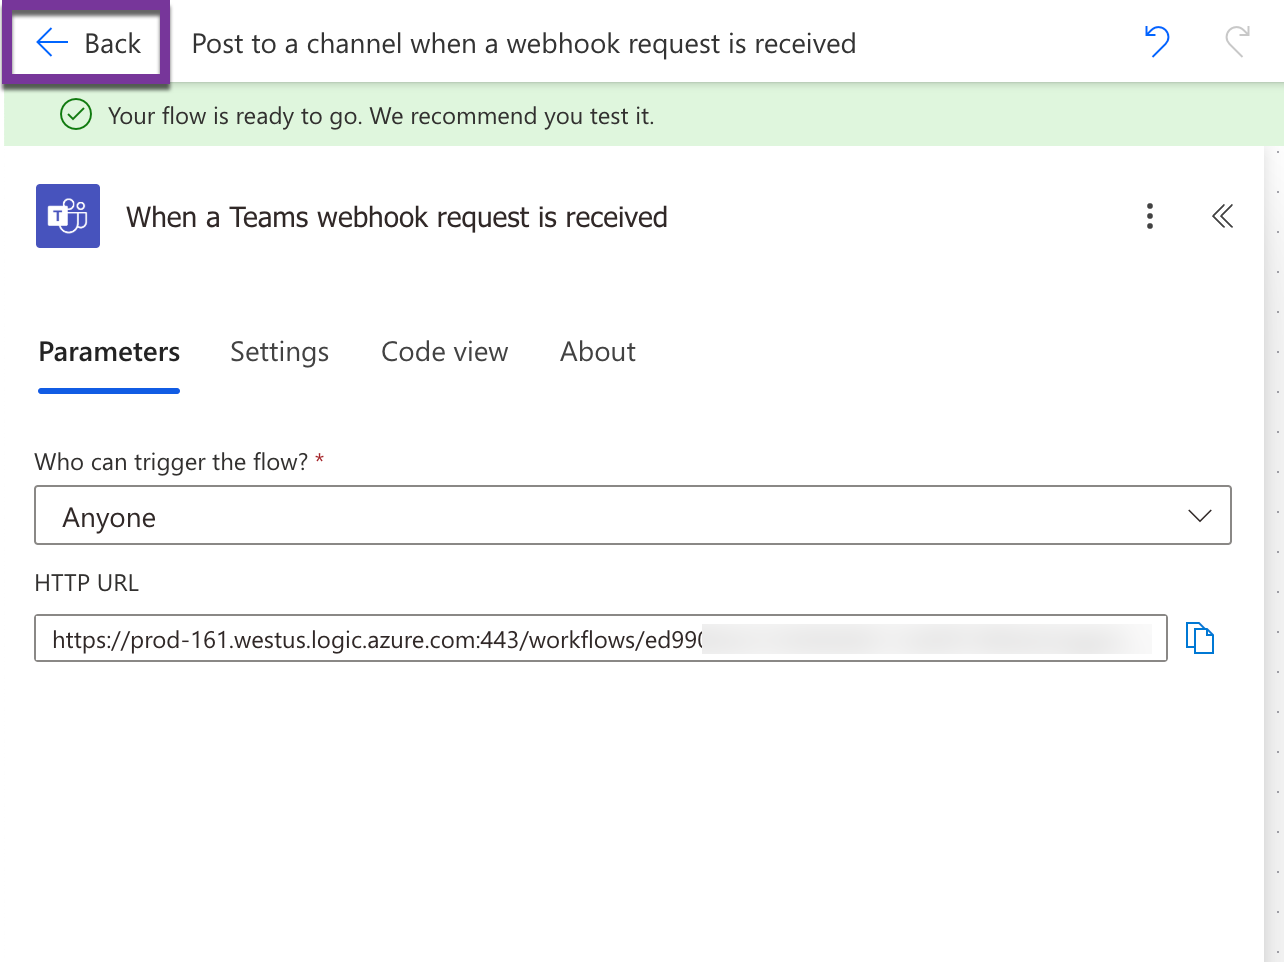
Click the Back button to navigate to the dashboard for the workflow.
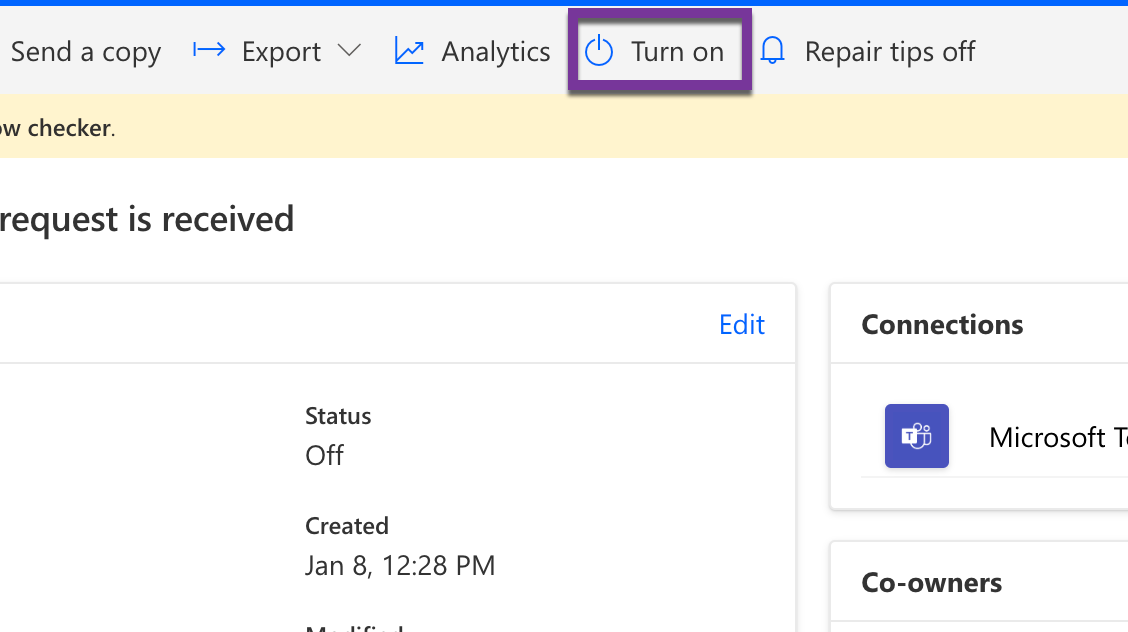
Ensure that the workflow is on by checking the dashboard. If it is off, click the “Turn on” button.
In Datadog, navigate to Integrations > Microsoft Teams.
On the Configuration tab, go to the Microsoft Workflows Webhooks section and click Add Handle. Give the handle a name (if migrating from a legacy connector handle, use the same name as the corresponding connector handle), and paste the webhook URL.
Click Save.
Private channels
To send notifications to private channels, the account configured within the Post Card to chat or channel block must have access to the channel. This enables the workflow to send notifications on behalf of that user account.
Within the Post Card to chat or channel block, change Post as to User.
Then to choose the account, click Change connection and follow the prompts to change the account.
Limitations
If you are a Microsoft 365 customer, workflows will automatically turn off after 90 days of no successful triggers. When a workflow is nearing expiration, Microsoft sends an email to the account that owns the workflow. This 90 day timer can be reset by running a test within Microsoft Workflows.
When using the template, all messages are appended with a line of text stating who created the workflow along with a link to the template.
To remove this, go to your workflow and click Save As to make a copy, navigate to the copy by finding it within My Flows, and use the new webhook from the copied workflow instead of the original workflow.
Microsoft Workflows does not support interactive features for the messages that it posts (such as muting monitors directly from Microsoft Teams).
Microsoft Workflows does not support shared channels.
Microsoft Workflows does not support user mentions when posting a Workflows Webhook as a User.
Usage
From a Datadog monitor, send a notification to Microsoft Teams using the @-notification feature. Send the notification to the address @teams-<HANDLE>, replacing <HANDLE> with the name of your Microsoft Teams handle.
User mentions with Microsoft Workflows Webhooks handles
User mentions allow you to notify specific users in your Microsoft Teams channels when monitor alerts are triggered. This helps ensure that the right people are notified about important events. To mention a specific user, follow the steps below to find their User Principal Name (UPN).
Syntax: <at>{User Principal Name}</at>
Example: <at>{user@microsoft.com}</at>
Complete notification example: @teams-CHANNEL_NAME <at>{user@microsoft.com}</at> <at>{another.user@microsoft.com}</at>
To find a user’s User Principal Name:
- In Microsoft Teams, click on the user’s profile picture or name to open their contact card.
- The UPN is listed in the
Chatfield, which is usually (but not always) the user’s email address.
User mentions are NOT supported for Workflows Webhook handles posted as a User (for private channels). Including a user mention when posting a Workflows Webhook as a user will fail. To include user mentions using Workflows Webhooks, you must use the Flow Bot.
Datadog recommends testing your monitor notifications to ensure reliable delivery, see Test notifications for instructions.
Limit edit access
By default, all users have full access to each Microsoft Workflows webhook handle.
Use Granular Access Control to limit which roles can edit a specific Workflows webhook handle:
- While viewing the Workflows Webhooks, hover over a handle to reveal actions on the right side of the row.
- Click the lock icon labeled Permissions.
- Click Restrict Access. The dialog box updates to show that members of your organization have Viewer access by default.
- Use the dropdown to select one or more roles, teams, or users that can edit the Workflows webhook handle.
- Click Add. The dialog box updates to show that the role you selected has the Editor permission.
- Click Save.
Note: To maintain your edit access to the Workflows webhook handle, you must include at least one role you belong to before saving.
If you have edit access, you can restore general access to a restricted Workflows webhook handle by completing the following steps:
- While viewing the Workflows Webhooks, hover over the restricted handle to reveal actions on the right side of the row.
- Click the lock icon labeled Permissions.
- Click Restore Full Access.
- Click Save.
To edit Workflows Webhooks permissions through the API:
- Fetch the Workflows Webhooks IDs using the Microsoft Teams Integration API.
- Use the Restriction Policies API, where the Resource Type is
integration-webhookand the id ismicrosoft-teams:<workflows_webhook_id>.
Migrate legacy connectors to tenant-based integration
Microsoft has announced that Office 365 connectors for Microsoft Teams are being deprecated. This has the following effects:
- All Datadog Connectors will stop working on January 31, 2025.
- Incoming Webhook Connectors without updated URLs will stop working on January 31, 2025.
- All connectors will stop working on December 31, 2025 (previously October 1, 2024).
See Microsoft’s blog post for more information.
To migrate all notification handles currently using the legacy Office 365 connectors over to the tenant-based Datadog app:
- Follow the setup steps to connect your Microsoft tenant to Datadog.
- Add the Datadog app to all teams where you have a legacy Office 365 connector configured.
- For each legacy notification connector handle in the Microsoft Teams Integration Tile:
- Under the configured tenant, click Add Handle.
- Give the new handle the same name as the connector handle. For example, if your legacy connector handle is named
channel-123, create a new handle in the tenant configuration with the namechannel-123. - Select the desired team and channel from the drop-down menus that the legacy connector handle was sending the message to, and click Save. This new handle overrides the existing legacy connector handle.
- Follow the setup steps to connect your Microsoft tenant to Datadog.
- Add the Datadog for Government app to all teams where you have a legacy Office 365 connector configured.
- For each legacy notification connector handle in the Microsoft Teams Integration Tile:
- Under the configured tenant, click Add Handle.
- Give the new handle the same name as the connector handle. For example, if your legacy connector handle is named
channel-123, create a new handle in the tenant configuration with the namechannel-123. - Select the desired team and channel from the drop-down menus that the legacy connector handle was sending the message to, and click Save. This new handle overrides the existing legacy connector handle.
Migrate from legacy connectors to the Microsoft Workflows Webhooks integration
Microsoft has announced that Office 365 connectors for Microsoft Teams are being deprecated. This has the following effects:
- All Datadog Connectors will stop working on January 31, 2025.
- Incoming Webhook Connectors without updated URLs will stop working on January 31, 2025.
- All connectors will stop working on December 31, 2025 (previously October 1, 2024).
See Microsoft’s blog post for more information.
To migrate all notification handles currently using the legacy Office 365 connectors over to Datadog’s Microsoft Workflows webhooks integration, see Microsoft Workflows Webhooks.
Connector setup (deprecated)
Legacy notification handles are not affected by the new setup unless you use the same
@teams-HANDLE_NAME, in which case the new configuration overrides the legacy configuration.Choose the
...button next to the channel name in the list of channels and then choose Connectors.Search for Datadog and click Configure.
In the connector configuration modal, copy the webhook URL.
In Datadog, navigate to Integrations > Microsoft Teams.
On the Configuration tab, click Add Handle, give the handle a name, and paste the webhook URL.
In the connector configuration modal, click Save.
Datadog Incident Management in Microsoft Teams
Account setup
First, install the Datadog App in Microsoft Teams:
Open Microsoft Teams.
In the vertical toolbar, click Apps.
Search for “Datadog” and click on Open.
In the modal that opens, select the primary channel of the team where the app should be added. Click Go to complete the installation.
Next, connect your Microsoft tenant to Datadog:
- In Datadog, navigate to the Microsoft Teams Integration Tile.
- Click Add Tenant, which redirects you to Microsoft.
- Follow the prompts and click OK.
Some Datadog Incident Management features need permission to perform actions on your tenant, for example, creating a new team for an incident. You need someone who is authorized to consent on behalf of the Microsoft organization to grant tenant-wide admin consent, such as a user assigned the Global Admin role. View Microsoft Entra ID documentation for more information on who can grant tenant-wide admin consent to the Datadog application.
To grant consent:
- Navigate to the Microsoft Teams Integration Tile in Datadog.
- For the tenant in which you want to use Incident Management, click the gear icon on the right-hand side.
- Click Authorize Tenant, which redirects you to Microsoft. A user who can grant tenant-wide admin consent must perform this step. This user must have a Datadog account, but the email used for their Datadog account does not need to match the email for their Microsoft account.
- Follow the prompts and click OK.
User setup
Performing actions in Datadog from Microsoft Teams requires you to connect your Datadog and Microsoft Team accounts.
To connect your account from Microsoft Teams:
Open Microsoft Teams.
Start a chat with the Datadog bot by clicking on the
...button in the vertical toolbar and selecting Datadog.Type “accounts” and hit enter.
The Datadog bot will respond with instructions on how to connect your accounts. Click Connect Datadog Account.
The Datadog bot will then send a message containing a link to connect your accounts. Click the link and follow the prompts.
You will be redirected back to the Microsoft Teams Integration Tile.
Create an application key by clicking Create in the prompt on the Microsoft Teams Integration Tile.
You can also connect your accounts from Datadog:
- In Datadog, navigate to the Microsoft Teams Integration Tile.
- Click Connect in the tenant listed.
- Follow the prompts and click OK.
- From the Microsoft Teams Integration Tile, create an application key by clicking Create in the above prompt.
Incident Usage
Incidents
To declare a new incident from Microsoft Teams:
- Start a conversation in a channel in any team, or a chat with the Datadog app.
- Type
@Datadog incident - An adaptive card appears. Click the Declare Incident button to open the Datadog tab and declare an incident.
A user must connect their Microsoft Teams account to their Datadog account to declare an incident.
When a new incident is created, a corresponding team named incident-(unique number ID) is created.
To update an incident, follow a similar process as creation:
- Start a conversation while in an incident team.
- Type
@Datadogor use the...button to open the Messaging extensions menu and select the Datadog App. - Select Update Incident.
- Complete the form with your desired information.
- Click Update.
List all open (active and stable) incidents with:
@Datadog list incidents
Use the “More actions” menu on any message inside an incident team on the far right to send that message to the incident Timeline.
Incident updates channel
Using an incident updates channel provides your stakeholders with organization-wide visibility into the status of all incidents directly from Microsoft Teams. Select which team and channel in your account to post these updates to, and the channel receives the following posts:
- Newly declared incidents.
- Changes to severity, status transition, and incident commander.
- Links to the incident’s overview page in App.
- Link to join the dedicated incident team.
Once the Microsoft Teams App has been installed, you can navigate to the Incident Settings page. From this, you can scroll down to the Incident Updates Channel section and begin the set-up flow.
How to set up an incident channel:
- Navigate to Incidents Settings.
- Under the Microsoft Teams section, select your connected Microsoft Teams tenant.
- Toggle on Automatically create a Microsoft Teams channel for every incident.
- Select the Team in which you want to automatically create new channels.
- Save your settings.
Data collected
Metrics
The Microsoft Teams integration does not provide any metrics.
Events
The Microsoft Teams integration does not include any events.
Service checks
The Microsoft Teams integration does not include any service checks.
Permissions
The Microsoft Teams integration receives the following permissions for Teams it has been added to. For more information, see Microsoft App permission reference.
| Permission description | Request Reason |
|---|---|
| Receive messages and data that I provide to it. | Users can interact with the Datadog app in personal chat. |
| Send me messages and notifications. | Users can interact with the Datadog app in personal chat. |
| Access my profile information such as my name, email address, company name, and preferred language. | Enable users to configure Microsoft Teams notifications and workflows within the Datadog UI. |
| Receive messages and data that team or chat members provide to it in a channel or chat. | Users can interact with Datadog through @Datadog commands. |
| Send messages and notifications in a channel or chat. | Send Datadog notifications to configured targets. |
| Access information from this team or chat such as team or chat name, channel list, and roster (including team or chat member’s names and email addresses) - and use this to contact them. | Enable users to configure Microsoft Teams notifications and workflows within Datadog. |
Additional permissions are needed to use Incident Management features in the Microsoft Teams integration. These must be authorized by a user with tenant-wide permissions (see Datadog Incident Management in Microsoft Teams: Account setup for detailed instructions). For more information on these permissions, see the Microsoft Graph permission reference.
| API / Permissions name | Type | Request Reason |
Channel.Create | Application and Delegated | Create channels to manage and remediate incidents using Datadog Incident Management. |
Channel.Delete.All | Application and Delegated | Auto Archive incident channels after a specified time period. |
ChannelMessage.Read.All | Application and Delegated | Automatically sync timeline messages to the incident timeline from an incident channel. |
ChannelSettings.ReadWrite.All | Application and Delegated | Create and modify channels to remediate incidents using Datadog Incident Management. |
Directory.Read.All,GroupMember.Read.All | Application | Provides team and channel name auto-complete suggestions for Datadog Incident Management configuration. |
TeamsTab.Create | Application and Delegated | Create a tab in a team for the Datadog app (this permission is required for an upcoming Microsoft Teams incident declaration experience). |
User.Read | Delegated | Provide details about the signed-in user to connect a Microsoft Teams account with a corresponding Datadog account. |
Troubleshooting
Using SSO
Use the following steps to set new channel connectors:
Login to Datadog, then complete setup steps 1 and 2.
After setup step 3 redirects you to Datadog from the MS Teams page, open a new tab and log into Datadog with your SSO. Then perform setup step 4 separately.
Why doesn’t my team show up in the integration tile?
If you added the bot to the team before adding the tenant to Datadog, then Datadog would have missed the team join event to know that the team exists. You can try to either:
- Synchronize your team standard channels to Datadog by posting
@Datadog syncon any standard channel for that team:
- Navigate to a standard channel in the Team that you want to synchronize.
- Start a post on the channel.
- Post
@Datadog syncto the channel and wait for a confirmation message in the thread indicating the operation’s success.
- Remove the Datadog app from the team, then add it back again. Note: This removes configured connectors for that team. Perform this action only when you are ready to migrate all connectors for that team to Datadog’s tenant-based integration:
- Click the three dots next to the team name in the left sidebar.
- Click Manage Team.
- Go to the tab labelled Apps.
- Click the three dots next to the Datadog app.
- Click Remove.
- Re-add the Datadog app by following the setup steps.
If you added the bot to the team before adding the tenant to Datadog, then Datadog would have missed the team join event to know that the team exists. You can:
- Synchronize your team standard channels to Datadog by posting
@Datadog for Government syncon any standard channel for that team:
- Navigate to a standard channel in the Team that you want to synchronize.
- Start a post on the channel.
- Post
@Datadog for Government syncto the channel and wait for a confirmation message in the thread indicating the operation’s success.
- Remove the Datadog for Government app from the team, then add it back. Note: This removes configured connectors for that team. Perform this action only when you are ready to migrate all connectors for that team to Datadog’s tenant-based integration.
- Click the three dots next to the team name in the left sidebar.
- Click Manage Team.
- Go to the tab labelled Apps.
- Click the three dots next to the Datadog for Government app.
- Click Remove.
- Re-add the Datadog for Government app by following the setup steps.
Are private channels supported by the bot?
Due to the private channel limitations in Microsoft Teams, private channels are not supported by the bot. If you want to send notifications to private channels, see Microsoft Workflows Webhooks
Are multiple user mentions supported in monitor notifications?
Yes, you can include multiple user mentions in a single notification to ensure all relevant team members are notified.
Example: @teams-handle <at>{user1@microsoft.com}</at> <at>{user2@microsoft.com}</at> <at>{user3@microsoft.com}</at>
When multiple user mentions are included in a notification and one is invalid, the valid users will still receive notifications, but invalid user mentions may cause the mentions to appear out of order.
Is the Datadog for Government app supported in GCC or GCC High?
Currently, the Datadog for Government app only supports Datadog US1-FED customers who are trying to connect to their commercial Microsoft Teams tenant. GCC and GCC High tenants are not supported by the app.
Need help? Contact Datadog support.
